Withdrawal
Attention. Operations for removing the oil pan, cleaning the mating surfaces and installing the pan in place can only be performed with special skills, otherwise this operation is best performed on the engine removed from the vehicle. When installing the oil pan, only a new gasket should be used.
Remove the ground wire from the battery. Drain the engine oil, then clean and refit the drain plug, tightening it to the correct torque. Remove the starter.
Remove the accessory drive belt cover. Disconnect the connector from the oxygen sensor.
Unscrew the two nuts securing the exhaust pipe to the front of the exhaust manifold, disconnect the rubber cushions of the entire exhaust system and remove the exhaust system from under the car.
Unscrew bolts of fastening of the pallet to a transmission.
Gradually unscrew the bolts securing the oil pan to the crankcase, then use the lever to separate and remove the pan.
Remove the oil pan gasket.
Installation
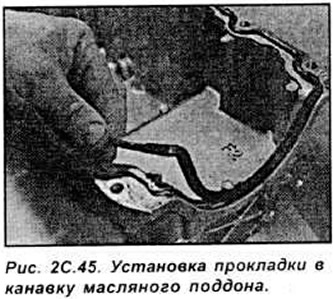
Completely clean the mating surfaces of the oil pan and cylinder block. Install the gasket in the oil pan groove (see fig. 2C.45).
If the pallet is installed on the engine installed together with the gearbox in the car, perform the following operations:
- check that the mating surfaces of the sump, cylinder block and gearbox are absolutely clean and flat. Any gaskets found when removing the sump must be refitted to their original locations.
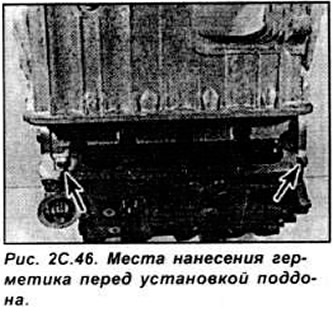
- apply a thin layer of sealant (Hylosil 102) on the connecting surfaces of the cylinder block with the oil pump and the left crankshaft oil seal cover. The pan bolts must be tightened no more than 10 minutes after applying the sealant.
- check that the engine/transmission lower connection board is correctly positioned and tighten its mounting bolts.
- without moving the pallet, in a diagonal sequence from the center to the edge, tighten the bolts securing the pallet to the required torque.
- further installation is carried out in the reverse order of removal.
If the sump is installed on the engine with the gearbox removed, proceed as follows:
- apply a thin layer of sealant (Hylosil 102) on the connecting surfaces of the crankcase of the cylinder block with the oil pump and the left crankshaft oil seal cover. The pan bolts must be tightened no more than 10 minutes after applying the sealant:
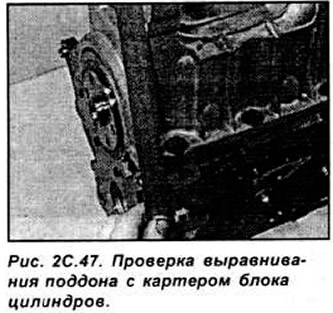
- using a suitable tool, check the alignment of the sump with the front of the cylinder block. Any gaskets found when removing the sump must be refitted to their original locations. Without moving the pallet, in a diagonal sequence from the center to the edge, tighten the bolts securing the pallet to the required torque;
- check the alignment of the sump with the front of the cylinder block and, if necessary, unscrew the sump mounting bolts again, clean the mating surfaces, and repeat the steps to install the sump.
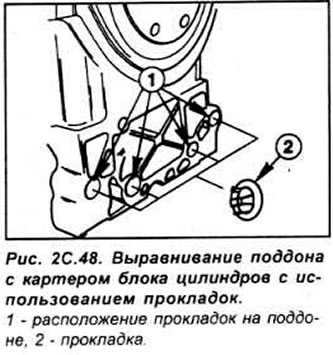
- if it is not possible to achieve exact alignment of the sump with the front of the cylinder block by moving the sump, shims 0.25 mm thick can be used (marked in yellow) or 0.5 mm (marked in black);
- further installation is carried out in the reverse order of removal (see fig. 2C.46-2C.48).
Visitor comments