Contents: Headlights. Models up to 1996 ↳ Models since 1996 ↳ Front Direction Indicator. Models… ↳ XR3i Models ↳ Models since 1996 ↳ Front side light for XR3i models ↳ Front fog light for XR3i models ↳ Side turn signal repeater ↳ Reversing lights ↳ License plate light ↳ Rear Fog Light. Models before 1993 ↳
Remove the ground cable from the battery.
Headlights. Models up to 1996
Open and secure the hood in the open position. On pre-1993 models, remove the 4 screws securing the grille and remove it. On XR3i models, remove the 4 screws and lift the grille up out of the two slots. Remove the front turn signal.
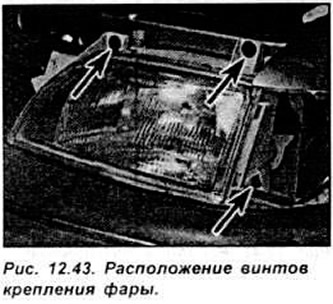
At the rear of the headlight, disconnect the electrical connectors from the high and low beam bulbs and the parking light bulb. First unscrew the lower headlight mounting screw, then both upper screws (see Fig. 12.43).
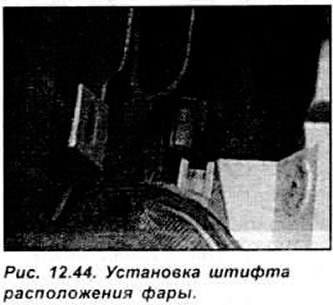
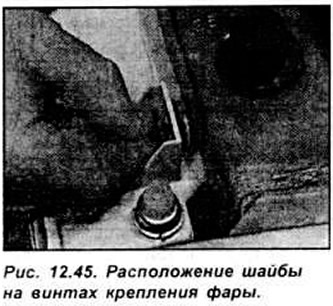
Remove the headlight forwards from the vehicle. Installation is performed in the reverse order of removal. When reinstalling the headlight, check that the positioning pin is seated in the recess and pay attention to the position of the washers on the mounting screws. Align the headlight relative to the turn signal so that the upper and lower spacer ribs are adjacent to the turn signal. Make sure that the gap between the headlight and the turn signal is parallel. In this position, tighten both upper mounting screws. Remove the turn signal, then tighten the lower mounting bolt and reinstall the turn signal. If necessary, adjust the beam of light from the headlights (see Fig. 12.44, 12.45).
Models since 1996
Remove the radiator grille and front bumper.
Unscrew the 3 screws securing the headlight to the body.
Disconnect the electrical connectors from the back of the headlight and remove the headlight from the vehicle.
Installation is carried out in the reverse order of removal.
Front Direction Indicator. Models before 1996 except XR3i
Disconnect the retaining spring from the rear of the turn signal lamp.
Move the turn signal forward and remove it from the vehicle.
Turn the bulb holder and remove it from the rear of the turn signal.
Remove the turn signal from the vehicle.
Installation is carried out in the reverse order of removal.
XR3i Models
Insert a small, thin screwdriver between the top edge of the turn signal and the bumper and release the mounting bracket.
Remove the turn signal assembly from the bumper.
Turn the bulb holder and remove it from the rear of the turn signal.
Installation is carried out in the reverse order of removal.
Models since 1996
On models from 1996 onwards, the direction indicator is an integral part of the headlight.
Front side light for XR3i models
Disconnect the retaining spring from the rear of the parking light.
Move the parking light forward.
Turn the bulb holder and remove it from the rear of the parking light.
Remove the parking light from the vehicle.
Installation is carried out in the reverse order of removal.
Front fog light for XR3i models
Insert a small, thin screwdriver between the top edge of the turn signal and the bumper and pry the mounting bracket off.
Remove the turn signal from the bumper.
Turn the bulb holder and remove it from the rear of the turn signal.
Bend back the turn signal retaining spring clip, release the front fog lamp and pull it forward.
Remove the bulb from the front fog light.
Installation is carried out in the reverse order of removal.
Side turn signal repeater
Open and secure the hood in the open position. Disconnect the side turn signal repeater electrical connector on the engine compartment bulkhead and tie a thin, long cord to the connector. You will need this cord to re-tighten the side turn signal repeater wires into place during installation.
Turn the side turn signal repeater clockwise and remove it from the front fender.
Installation is carried out in the reverse order of removal.
Reversing lights
Remove the bulb holder from the luggage compartment.
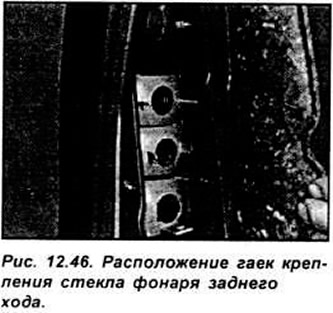
Unscrew the nuts and remove the reversing light glass from the rear of the vehicle (see Fig. 12.46).
Replace the reversing light glass seal if necessary.
Installation is carried out in the reverse order of removal.
License plate light
Using a pry bar, remove the license plate light from the rear bumper and disconnect the electrical connector.
Installation is carried out in the reverse order of removal.
Rear Fog Light. Models before 1993
Open the rear door, unscrew the 10 mounting screws and remove the interior trim at the rear of the car. Disconnect the electrical connector, then unscrew the lock nut and remove the reversing light. Installation is carried out in the reverse order of removal.
The original article can be viewed on the portal: fordbook