Contents: Interior lighting ↳ Trunk lighting ↳ Instrument cluster lighting lamps ↳ Heater Control Panel Lighting.… ↳ Models since 1996 ↳ Automatic transmission scale… ↳ Glove box illumination ↳ Hazard warning lights ↳ Watch backlight. Models before 1996 ↳ Models since 1996 ↳ Cigarette lighter illumination ↳
Interior lighting
Set the switch to the middle position. Insert a small screwdriver from the side opposite the switch and push the lamp with the switch out of the ceiling (see Fig. 12.37).
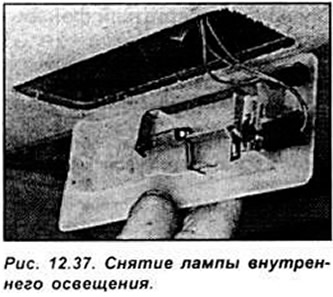
Turn the bulb left or right and remove it from the holders. Install a new bulb in the reverse order of removal.
Trunk lighting
Using a thin screwdriver, remove the trunk light from its socket (see Fig. 12.38).
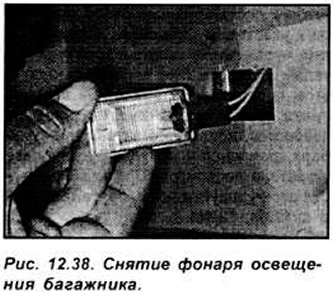
Turn the socket with the bulb to the left and remove it from the lamp. Remove the bulb from the socket. Install the new bulb in the reverse order of removal.
Instrument cluster lighting lamps
Remove the instrument cluster. Turn the socket with the bulb a quarter turn. To align the projections on the socket with the grooves on the instrument cluster, and remove the socket with the bulb from the instrument cluster (see Fig. 12.39).
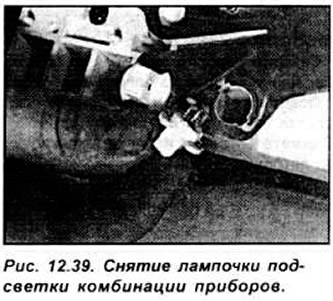
The installation of a new light bulb is carried out in the reverse order of removal.
Heater Control Panel Lighting. Pre-1996 Models
Unscrew the 2 screws from the top of the instrument cluster trim panel and remove it. Using a lever, remove the 3 heater control knobs, then unscrew the screws and remove the heater control panel. Pull the heater control panel out far enough to gain access to the bulbs at the rear of the panel (see Fig. 12.40).
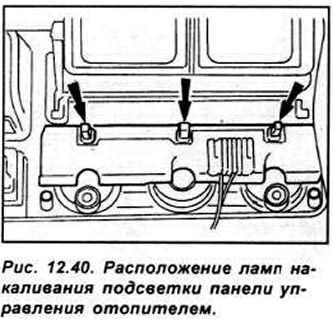
Turn the bulbs counterclockwise to remove them. Install a new bulb in the reverse order of removal.
Models since 1996
Remove the ground cable from the battery. Unscrew the 2 mounting screws and remove the upper steering column cover.
Unscrew the 4 mounting screws and remove the lower steering column cover. Remove the steering wheel.
Using a lever, remove the 3 heater control knobs.
Unscrew the 2 screws from the top back of the instrument cluster holder. Release the holder from the mounting brackets (two at the top, four at the base and one on the side farthest from the steering wheel). Remove the holder and disconnect the electrical connectors. Turn the bulbs counterclockwise to remove them. Install the new bulb in the reverse order of removal.
Automatic transmission scale illumination
Using a lever, remove the automatic transmission scale from the lever cover, then remove the socket with the bulb from the mount, turn and remove the incandescent bulb from the socket.
The light bulb is installed in the reverse order of removal.
Glove box illumination
Open the glove compartment, unscrew the 2 mounting screws and remove the backlight together with the switch.
Using the lever, remove the lampshade from the backlight, turn and remove the incandescent lamp from the holder (see Fig. 12.41).
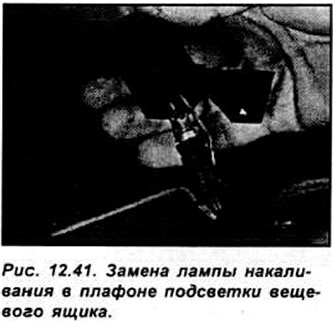
The light bulb is installed in the reverse order of removal.
Hazard warning lights
Pull the hazard warning switch button upward and remove the bulb from the holder.
The light bulb is installed in the reverse order of removal.
Watch backlight. Models before 1996
Insert a narrow screwdriver between the clock and the instrument panel, using a rag or paper underneath to avoid scratching the instrument panel. Carefully remove the clock from the instrument panel. Turn the bulb holder and remove it from the back of the clock (see Fig. 12.42).
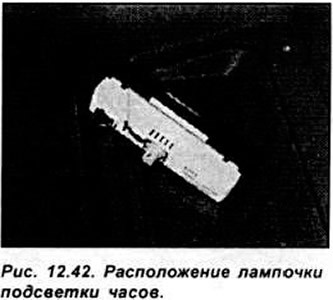
The light bulb is installed in the reverse order of removal.
Models since 1996
Remove the instrument cluster trim from the instrument panel.
Turn the socket with the clock backlight bulb counterclockwise. Remove the socket and take the bulb out of the socket.
The installation of a new light bulb is carried out in the reverse order of removal.
Cigarette lighter illumination
Remove the cigarette lighter. On 1996 and later models, remove the light ring from the dash. Remove the bulb from the light ring. On 1996 and later models, remove the bulb and socket from the lighter housing and remove the bulb from the socket. Install the new bulb in the reverse order of removal.
The original article is available on the website [www.fordbook.ru]