NOTE: Install new snap rings onto the drive shafts so that they fit into the grooves of the axle gears.
Lower the vehicle and remove the engine support crossmember. Tighten the mounting bolts at the top of the gearbox housing. Install the forced reverse gear shift drive rod onto the gear shift control valve shaft (Fig. 3.46), without tightening the nut.
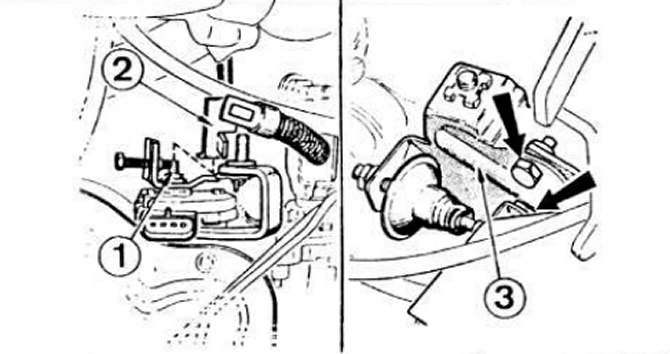 Fig. 3.46. Installing the forced reverse gear shift rod.
1 — valve axis; 2 - traction; 3 — rod mounting bracket.
On the right side of the engine, install the tie rod bracket by tightening two bolts. Then tighten the tie rod mounting nut on the side of the gearbox housing. Make sure that the selector lever in the passenger compartment and the selector shaft lever are in the "D" position, connect the selector cable to the shaft lever. Connect the starter interlock switch connector block. Connect the negative cable to the battery. Check the oil level in the gearbox housing, top up if necessary. Adjust the forced reverse gear shift drive as described below.
The full article is on the online resource www.FordBook.ru