Removal
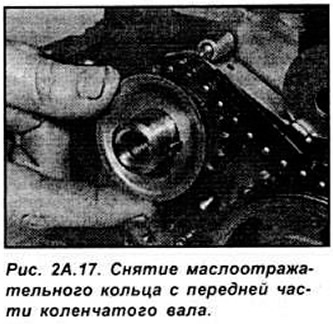
Remove the chain cover Remove the oil deflector ring from the front of the crankshaft (see Fig. 2A.17).
Rotate the chain tensioner cam back against the spring force and remove the chain tensioner lever from the pivot pin on the front main bearing cover (see Fig. 2A.18).
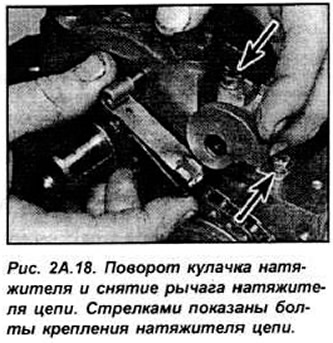
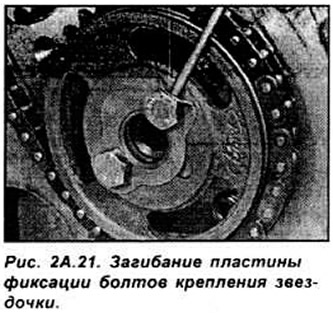
Remove the bolts and chain tensioner. Bend back the sprocket bolt retaining plate, then remove the bolts. On Endura-E engines, note the position of the camshaft position sensor rotor plate.
Remove the sprocket together with the chain.
Inspection
Check the teeth on the sprockets for wear or damage.
The chain should always be replaced during a major engine overhaul.
Examine the rubber pad on the tensioner mechanism.
Installation
Install the chain tensioner in place and secure with bolts. Check that the front of the cam is parallel to the cylinder block. The maximum permissible difference between the two measuring points of the tensioner and the cylinder block is 0.2 mm.
Turn the crankshaft so that the timing mark on the sprocket is aligned with the center of the camshaft sprocket.
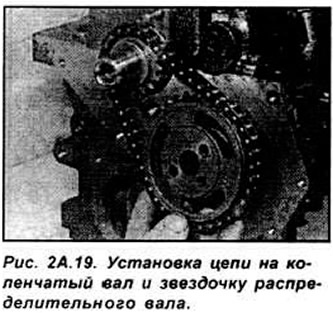
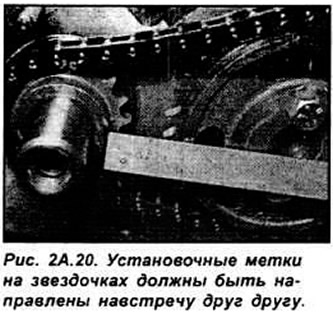
Install the chain on the camshaft sprocket, then install the chain on the teeth of the crankshaft sprocket. Install the camshaft sprocket on the flange, and check that the holes for the sprocket bolts are aligned with the holes in the flange. Also check that the timing marks on both sprockets are facing each other. If necessary, turn the camshaft to align the marks on the sprockets (see Fig. 2A.19, 2A.20).
Bolt the camshaft sprocket. Secure the bolts from loosening by bending the retaining plate. Remember the rotor plate location on Endura-E engines (see Fig. 2A.21).
Press the chain tensioner cam back, and then install the tensioner lever onto the pivot pin. Release the cam so that it presses the lever.
Install the oil deflector washer onto the crankshaft. Install the camshaft timing chain cover.