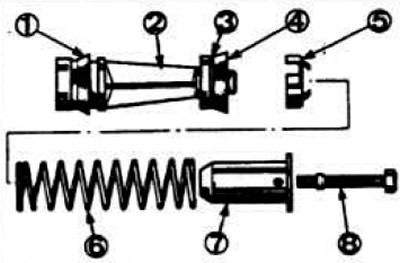
 Fig. 6.13. Details of the first piston.
1 and 4 - cuffs; 2 — piston; 3 - support washer; 5 - thrust washer; 6 - return spring; 7 — bushing; 8 — screw.
Remove spring 6 (Fig. 6.14), thrust washer 5 and seals 4 and 1 from the second piston.
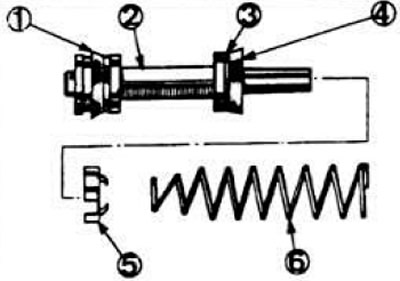 Fig. 6.14. Details of the second piston.
1 and 4 - cuffs; 2 — piston; 3 - support washer; 5 - thrust washer; 6 — spring.
Check the technical condition of the master cylinder and wash all parts in brake fluid or industrial alcohol. Install the seals, thrust washer and spring on the second piston. Dip the assembled piston in brake fluid and carefully install it into the master cylinder with the spring forward. Assemble the first piston, dip it in brake fluid and install it into the master cylinder. Install a new protective cover and washer on the pusher, insert the pusher into the master cylinder and install the retaining ring. Slide the protective cover onto the master cylinder body, press the pusher and tighten the lock screw into the lower part of the body. Install the rubber seals and reservoir on the master cylinder.
The text of the article was copied from the website (www.fordbook.ru)