Warning: Do not attempt to repair the brake master cylinder if the vehicle is a 1990 model year with ABS (Anti-lock Braking System). See section 18.
Removal
1. Place rags under the pipe ends, prepare caps and plastic plugs for them.
Caution: Brake fluid will damage paint. Cover all body parts and be careful not to spill brake fluid while working.
2. Unscrew the nuts from the pipes at the ends of the pipelines where they enter the master cylinder (see figure).
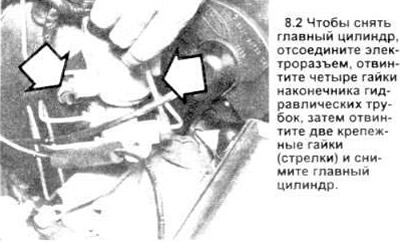
3. Slightly move the lines away from the master cylinder and cap the ends to prevent leaks.
4. Disconnect the electrical contact of the brake system light switch, unscrew the two nuts securing the master cylinder, and remove the master cylinder from the vehicle.
5. Remove the tank cap and drain the remaining liquid from the tank.
Bulkhead
6. Place the master cylinder in a vice so that the jaws clamp the support flange.
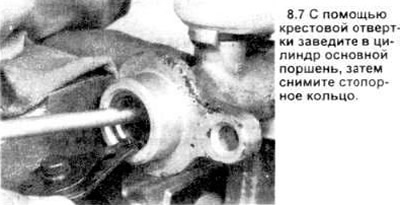
7. Press the piston back and remove the retaining ring using special pliers (see figure).
8. Remove the main piston block from the cylinder bore (see figure).

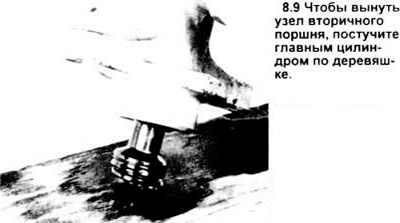
9. Remove the secondary piston assembly from the cylinder. You may have to remove the cylinder from the vice, turn it over, and gently tap it on a piece of wood to remove the piston (see picture).
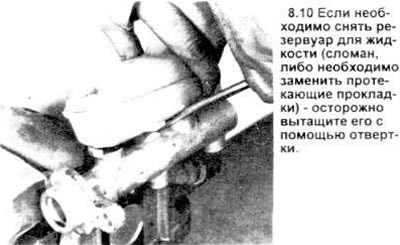
10. If fluid leaks through the sealing rings, use a screwdriver to pry the reservoir out of the cylinder body (see figure). Remove the sealing rings.
11. There may be corrosion and damage in the cylinder bore. If there is, the brake master cylinder must be replaced with a new one, as abrasive materials must not be used in the cylinder bore.
12. Lubricate the new sealing rings with silicone grease and insert them into the master cylinder body. Make sure they are installed correctly.
13. Place the reservoir on a hard surface and, applying pressure from above, use a rotating motion to place the master cylinder body onto the reservoir.
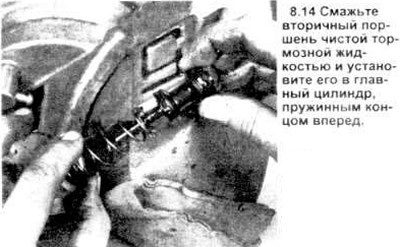
14. Lubricate the cylinder bore and the primary and secondary pistons with clean brake fluid. Install the secondary piston assembly into the cylinder (see figure).
15. Install the main piston into the cylinder bore, lower it and install the retaining ring.
16. Inspect the tank cover and diaphragm - there may be cracks and deformations. Replace damaged parts.
17. Note: When removing the master cylinder, the fluid must be drained from the hydraulic system. Draining time can be reduced when the cylinder is filled with fluid and a drain container is installed under it on the vehicle (paragraphs 18 to 25).
18. Screw the threaded plugs of the appropriate size into the cylinder outlet ports, fill the reservoirs with brake fluid. The cylinder must be installed so that the fluid does not overflow during release.
19. Remove the plugs one at a time, starting with the rear holes closest to the booster), push the piston into the hole to remove air from the master cylinder. To prevent air from getting back in, the corresponding plug must be replaced before returning the piston to its original position.
20. The piston should make three to four strokes to each hole to ensure that all the air has been expelled.
21. Since the bleeding procedure requires high pressure, it is possible to remove and replace the plug on each stroke of the piston. Before pushing the piston, remove one of the plugs completely. However, before opening the piston, instead of replacing the plug, firmly pinch the hole with your finger to prevent air from leaking back into the master cylinder. Wait a few seconds for the brake fluid from the reservoir to flow into the piston hole, then repeat the procedure. As the piston moves downward under pressure, it will "blow" the finger off the hole, forcing out the air from inside. Only when brake fluid flows out of the hole, replace the plug and move on to the next hole.
22. Refill the master cylinder reservoirs, install the diaphragm and cover.
Installation
23. Carefully install the master cylinder by performing the removal elements in the reverse order, then bleed the brakes (see section 11).