Contents: General part ↳ Motor oil ↳ Coolant ↳ Washer fluid for headlights,… ↳ Battery electrolyte ↳ Brake fluid ↳ Power steering fluid ↳
General part
1. Fluids are essential components in the lubrication, cooling, brake, clutch and windshield washer systems. Since fluids are gradually consumed or become contaminated during normal vehicle operation, they must be topped up periodically. Before adding fluid to any of the components listed below, please review the section "Recommended lubricants and fluids", given at the beginning of this chapter.
Note: When checking the fluid level, the vehicle must be parked on a level surface.
Motor oil
2. The engine oil level is measured using the dipstick located in the passenger side of the engine compartment and identified by a yellow/black plastic clip. The dipstick passes through the tube to the bottom of the engine oil pan.
3. The engine oil level must be measured before driving the car or 15 minutes after stopping the engine. If you check immediately after driving, some oil will be in the components located at the top of the engine, which will affect the height of the mark left on the oil dipstick.
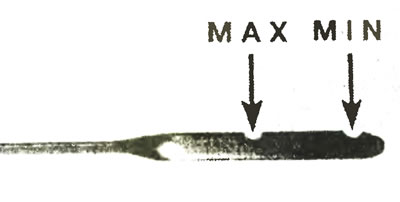
Figure 3.4. Maximum ("MAX") and minimum ("MIN") oil level marks on the dipstick.
4. Remove the dipstick from the tube and wipe it dry with a clean cloth or paper towel. Pay attention to the minimum and maximum oil level markings on the dipstick - these may be painted marks or grooves (see figure 3.4). Reinsert the clean dipstick all the way into the tube, then remove it again. The engine oil level in the engine coincides with the height of the wetted area of the dipstick end and should be between the two marks on the dipstick.
5. Do not allow the oil level to drop below the minimum mark, as oil starvation can cause engine damage. On the other hand, engine overflow (adding oil above the maximum mark on the dipstick) may cause oil leaks and damage to seals.
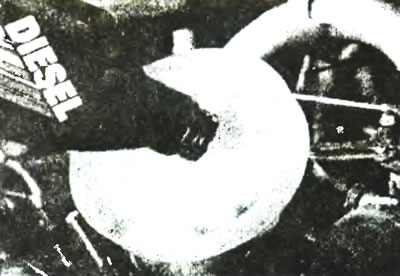
Figure 3.6. This is how engine oil is added to the cylinder block.
6. Remove the filler cap located on the front side of the cylinder head cover valves. Top up with oil of the appropriate brand and type (see Specifications), using a funnel to avoid stains (see Figure 3.6). To raise the oil level from the minimum to the maximum mark on the dipstick, approximately 0.5-1.0 liters of oil is required. After adding oil, replace the oil filler cap, start the engine and let it idle to allow the oil to circulate throughout the engine. While waiting, carefully inspect the engine for any oil leaks, especially around the oil filter and drain plug. With the engine stopped, recheck the oil level to ensure that the oil level is within normal limits after it has had sufficient time to circulate through the upper block and cylinder head passages.
7. Checking the oil level is an important preventative maintenance step. A persistent lack of oil indicates leaks through damaged seals, defective gaskets, or around worn piston rings or valve guides. If the oil is milky in color or contains water particles, this indicates a possible burnt-out cylinder head gasket - immediately check the engine oil pressure (see Chapter 2a). The consistency of the oil should also be controlled. Each time you check the oil level, run your thumb and forefinger across the dipstick before wiping off the oil. If metal particles are found stuck to the dipstick, the oil must be changed immediately (see Section 12).
Coolant
Warning: Do not allow antifreeze to come into contact with exposed skin or painted surfaces of the vehicle. Rinse contaminated areas immediately with plenty of water. Do not store new or leave old coolant within reach of children or pets - the sweet smell may attract them, but swallowing even a small amount of coolant can be fatal! Spilled coolant stains. wipe away any liquids immediately. Store antifreeze in a closed container, and repair any cooling system leaks as soon as they are noticed.
8. All models described in this manual are equipped with a sealed cooling system. The system's transparent plastic expansion tank is mounted on the engine compartment bulkhead and is connected to the system by hoses. When the engine is running, the coolant heats up and expands, and any excess coolant passes through the connecting hose into the expansion tank, which in turn is connected to the lower radiator hose, allowing the coolant to cool. fluid passes through the reservoir, returning back to the water pump - thus clearing the system of any air present in it. When the engine cools down, cool. the liquid is returned to the main components of the cooling system - thus automatically maintaining the correct level of cooling. liquids in the system.
9. Since the cooling level. the fluid level should be checked regularly, remember that it depends on the engine temperature. When the engine is cold, the coolant level should be between the "MAX" and "MIN" marks on the expansion tank; if the engine is hot, the level may rise above the "MAX" mark.
10. To obtain an accurate result, check the coolant level when the engine is cold - it should be between the "MAX" and "MIN" marks on the expansion tank (see Figure 3.10). If the fluid level is below the "MIN" mark, add fluid as follows.

Figure 3.10. "MAX" and "MIN" marks on the expansion tank
11. First, prepare enough chilled water. liquids by mixing clean, soft water and the recommended type of antifreeze in the percentage ratio specified in the specification. To make a standard 50% mixture used for topping off, mix equal volumes of water and antifreeze. If a small amount of coolant is required to top off the system to the proper level. liquid, you can use clean water, but repeating this procedure multiple times will reduce the concentration of antifreeze in the liquid, which will weaken the protection against freezing and corrosion that the antifreeze provides. To maintain the specified antifreeze/water ratio, the system must be topped up with the appropriate coolant ratio as described below. Use only ethylene glycol type antifreeze without additional inhibitors or additives.
Warning: Do not remove the expansion tank filler cap while the engine is running or has recently been turned off, as the cooling system is under pressure and the coolant may be extremely hot - boiling coolant may escape. the liquid and its vapors can cause severe scalding.
Figure 3.13. Adding antifreeze to the expansion tank
12. Wait until the system has completely cooled down (or at least 10 minutes after turning off the engine, if there is no time, and top up the system when the engine is warm). Wrap a thick cloth around the filler cap of the expansion tank and turn it slowly one turn. Once the hissing sound that accompanies the release of steam has stopped, slowly unscrew the cap, but do not remove it yet. If you hear hissing sounds again, wait until they stop and only then remove the filler cap. Keep your face, hands and other exposed areas of the body as far away from the opening lid as possible.
13. After removing the lid, add coolant. liquid to the "MAX" mark (see Figure 3.13). Replace the lid, tightening it securely.
14. The sealed cooling system rarely requires replenishment of the coolant level. if you frequently need to top up your fluid, or if the level drops sharply immediately after refilling, there may be a leak in the system. Inspect the radiator, hoses, expansion tank cap and water pump. If no leaks are found, have the filler cap and the entire system pressure tested by a dealer or suitably equipped service station; this will allow you to identify any leaks that are not visible to the naked eye. If a leak is found, check the residual concentration of antifreeze with a special hydrometer
15. This hydrometer can be purchased at auto parts stores. If the specific gravity of a sample taken with the engine off and completely cooled down is less than the specification, the specific gravity of the coolant. liquid levels dropped below the minimum. Increase the concentration of antifreeze (mixture density) there are two ways: either add pure antifreeze to the mixture, or, after draining and flushing the system, refill it with a fresh mixture of the required density.
16. When checking the coolant level. be sure to pay attention to the liquid's condition - it should be almost transparent. If it turns brown or rusty, drain and flush the system, then refill it. If you use antifreeze that does not meet Ford specifications, its corrosion inhibitors will quickly lose their effectiveness; so cool. the fluid must be renewed regularly, at the required intervals, even if it seems to you that it is in good condition.
Washer fluid for headlights, windshields and rear windows
Figure 3.17. Topping up the windshield washer system reservoir.
17. Windshield washer fluid (and headlights, on some models) is located in a plastic tank, which is installed in the right or left front corner of the engine compartment. The rear door washer system reservoir is mounted on the rear interior trim, on the right side. In moderate climates, the reservoir can be topped up with distilled water, but the reservoir should be filled no more than two-thirds full, taking into account the expansion of water when it freezes. In colder climates, a special washer fluid additive, available at almost any auto parts store, will help lower the washer fluid's freezing point. Do not use regular antifreeze for this purpose - it will damage the car enamel. The procedure is the same for all tanks - remove the plastic cap and add liquid if necessary (see Figure 3.17).
Battery electrolyte
18. On batteries of non-sealed type (see section 8), check the electrolyte level in each battery cell. The level should be approximately 10 mm above the plates; some batteries have "MAX" and "MIN" markings on the casing. If the level is low, use a coin to open the cap and add distilled water. Replace and tighten the cover securely.
Caution: Overfilling the battery cell may cause electrolyte to spill during charging, causing corrosion and other damage. Please also read the opening warning Section 9.
On early models that have two batteries, be sure to check and top up both batteries.
Brake fluid
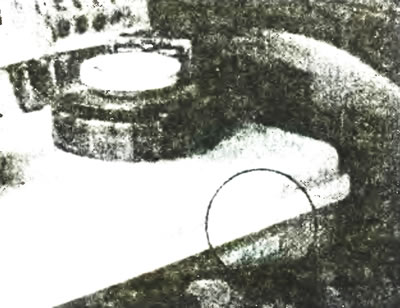
Figure 3.19. Maximum and minimum brake fluid level marks on the side of the reservoir.
19. The auxiliary brake fluid reservoir is mounted on top of the master cylinder, attached to the front of the vacuum servo unit. The "MAX" and "MIN" marks are visible on the side of the transparent reservoir, and the liquid level should be maintained between these marks (see Figure 3.19).
20. If the car is parked on a level surface, the brake fluid level is usually at or slightly below the "MAX" mark.
21. Gradual wear of the brake pads and brake shoe linings lowers the fluid level in the reservoir somewhat: however, when the pads are replaced, the original fluid level is restored. Therefore, there is no need to add fluid to compensate for this minimal decrease, however, the brake fluid level should never be allowed to fall below the "MIN" mark.
Figure 3.22. Adding brake fluid.
22. If you need to add fluid, first wipe the area around the filler cap with a clean cloth, then remove the cap. Add liquid carefully, avoiding spilling on painted surfaces (see Figure 3.22). Use only the specified hydraulic fluid, as mixing different types of fluid may cause damage to the system.
Warning: Brake fluid is dangerous to the eyes and can damage car paint - be extremely careful when transporting and pouring it. Wash away any spilled liquid immediately with plenty of water. Do not use liquid that has been left open for some time, as it will absorb moisture from the air. Excess water in brake fluid causes corrosion and "brake fade.".
23. When adding liquid, it makes sense to inspect the tank for contamination. The system should be drained and filled with fresh fluid if deposits, dirt particles or other types of contaminants are visible.
24. After filling the tank to the required level, make sure that it is securely closed with a lid to avoid leaks and contamination of the liquid.
25. The need to frequently add fluid to the reservoir indicates the presence of leaks in the brake system, which must be eliminated immediately.
Power steering fluid
26. See Section 5 of this Chapter.
[The original article is available on the website: www.fordbook.ru]