Contents: Removal ↳ Installation ↳
Removal
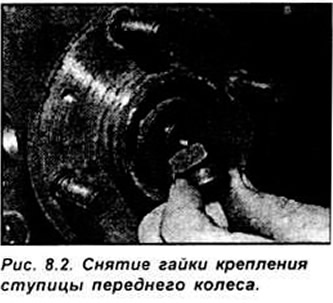
Remove the hubcap from the front wheel on the desired side. Using a small drift, loosen the front wheel hub nut.
Unscrew the nut by half a turn. Loosen the wheel mounting nuts. Raise the front of the car and secure it on stands. Remove the corresponding front wheel and unscrew the hub mounting nut. Remove the hub (see Fig. 8.2).
Unscrew the 2 front wheel caliper mounting bolts without disconnecting the brake hose. Using a soft wire, hang the caliper to the stand.
Disconnect the steering tie rod ball joint from the steering knuckle.
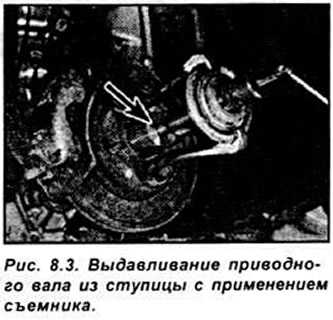
Remove the wishbone. First unscrew the mounting bolt on the bracket, then the nut on the ball joint, holding the bolt with a wrench to prevent it from turning. Remove the drive shaft from the hub by pulling the hub away from the car. Do not remove the drive shaft completely from the hub. If the drive shaft does not come out of the hub, use a hammer or puller to remove it (see Fig. 8.3).
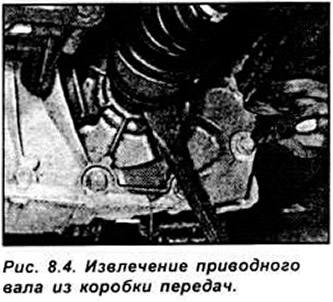
Remove the drive shaft from the gearbox. To do this, insert a pry bar between the inner CV joint and the gearbox housing and, while an assistant pulls the drive shaft outward, knock the drive shaft out of engagement in the differential axle gear with a strong, sharp blow to the end of the pry bar (see Fig. 8.4). Instead of the removed drive shaft, insert plastic or wooden plugs into the gearbox.
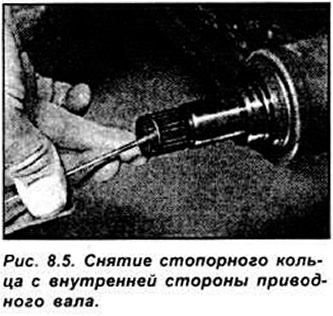
Remove the drive shaft from the hub. Remove the snap ring from the groove on the inside of the drive shaft.
When installing the drive shaft, it is necessary to install a new retaining ring and a ball joint nut locking pin (see Fig. 8.5).
Installation
Install the new snap ring into the groove on the inside of the drive shaft.
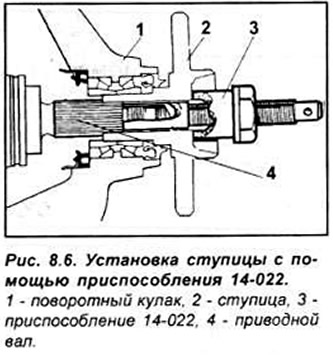
Thoroughly clean and lubricate the splined parts of the drive shaft and hub. Insert the drive shaft into the hub and using the 14-022 tool, tighten the drive shaft completely into the hub. Remove the tool, install a washer on the shaft and screw on a new nut without tightening it.
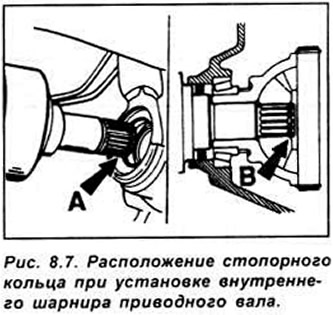
Remove the temporarily installed coffin from the gearbox. Lubricate the working lips of the differential seal ring and insert the inner end of the drive shaft into the gearbox. Align the splines on the shaft and gearbox and press the drive shaft until it is secured with a retaining ring (see Fig. 8.7).
Bolt the wishbone into place by inserting the ball joint into the steering knuckle and tighten to the specified torque.
Caution: When installing the transverse arm, do not turn the Torx bolt under any circumstances.
Connect the steering tie rod ball joint to the steering knuckle.
Install the brake caliper and secure with bolts, tightening them to the required torque.
Install the wheel by loosely tightening the mounting nuts.
Install the new hub nut and tighten it as much as possible. Check the ease of rotation of the wheel to check the correct installation of the bearings. Lower the car and finally tighten the hub mounting nut to the required torque. Secure the nut from unscrewing using a drift. Pin the flange of the nut into the groove of the drive shaft.
Tighten the wheel nuts to the specified torque. Check the gearbox oil level.