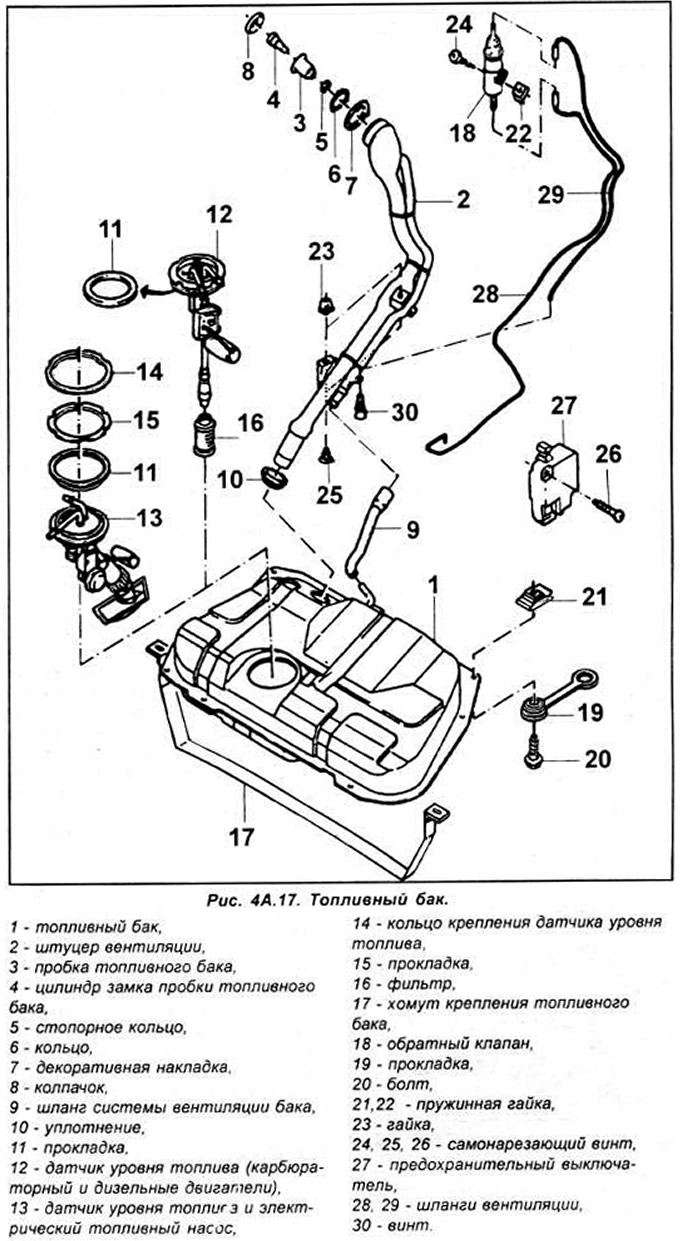
Removal
When removing the fuel tank, the fuel level in it should be at a minimum.
Remove the negative terminal from the battery. Remove the fuel filler cap and use a siphon to suck out any remaining fuel in the fuel tank. There is no drain plug in the fuel tank. Raise the rear of the vehicle and support it on stands.
Hatchback and Sedan models
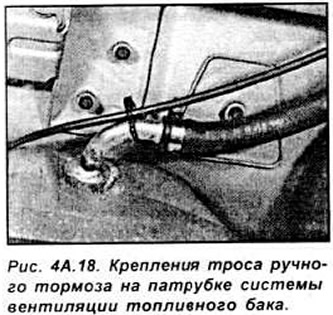
Unscrew the 2 bolts securing the fuel filler pipe located under the vehicle. Remove the handbrake cable bracket from the fuel tank ventilation system pipe. Disconnect the ventilation system hose from the pipe (see Fig. 4A.18).
Open the fuel filler cap and unscrew the screw securing the fuel tank filling pipe.
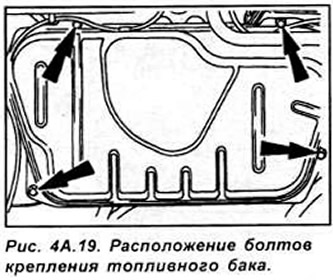
On models without a hinged fuel filler cap, remove the filler tube by turning the locking ring clockwise. Support the fuel tank and unscrew the 4 fuel tank mounting bolts from below. To facilitate access to the fuel tank mounting bolts, first unscrew the exhaust heat shields around the fuel tank (see Fig. 4A.19).
Partially lower the fuel tank and disconnect the thin vent line from the top of the fuel tank. Disconnect the connector on the fuel level sensor. Disconnect the feed and return lines from the sensor cover. To loosen the lines, press both buttons on the locks and remove the locks. The fuel supply hose connection from the tank is identified by the white color, and the return hose connection is yellow. Slowly lower the fuel tank and remove it from under the vehicle.
Van Models
Remove the connector from the fuel level sensor.
Supporting the fuel tank from below, unscrew the 2 screws securing the bracket that supports the fuel tank. Release the 3 brackets and separate the breather tube from the fuel tank. Open the fuel filler cap and unscrew the screw securing the fuel filler tube. On models without a hinged fuel cap, remove the filler tube by turning the locking ring clockwise.
Unscrew the 2 bolts securing the front part of the fuel tank and partially lower it.
Partially lower the fuel tank and disconnect the thin vent line from the top of the fuel tank. Disconnect the connector on the fuel level sensor. Disconnect the feed and return lines from the sensor cover. To loosen the lines, press both buttons on the locks and remove the locks. The connection of the hose that feeds fuel from the tank is identified by the white color and the connection of the return hose is yellow.
Examination
Visually inspect the condition of the fuel tank from the outside. After unscrewing and removing the fuel level sensor, inspect the fuel tank from the inside. If there is dirt or sediment in the tank, wash it with clean water or gasoline.
Caution: When working on the fuel tank, do not use open flames or tools that may create sparks.
Installation
Installation is carried out in the reverse order of removal.