Contents: Removal ↳ Installation ↳
Removal
Short console with manual transmission (models before 1996).
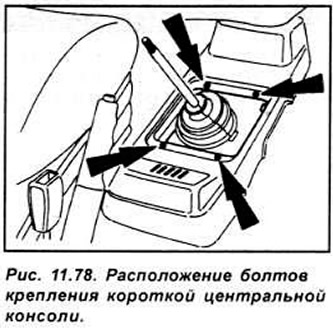
Unscrew the knob from the gear shift lever. Remove the lever protective cover and holder. Unscrew the 4 screws and remove the console (see Fig. 11.78).
Long center console (pre-1996 models)
Disconnect the negative battery terminal. On manual transmission models, remove the shift knob, boot, and bracket.
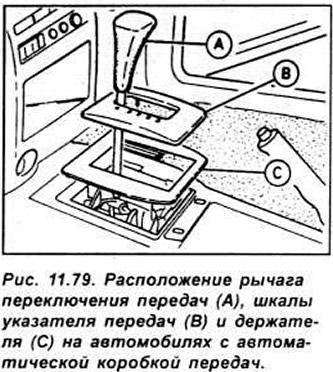
On models with automatic transmission, set the lever to the "P" position. Unscrew the gearshift knob, then use the lever to remove the gear indicator scale and holder (see Fig. 11.79).
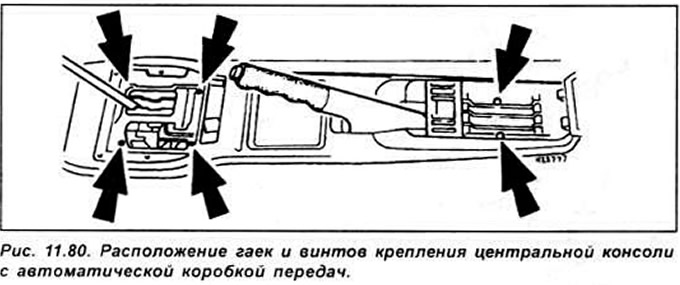
On vehicles with electric windows and an electrically controlled trunk lock, use the lever to remove the switches from the center console and disconnect the electrical connectors from them. Unscrew the 4 nuts and 2 screws securing the center console (see Fig. 11.80).
Fully apply the handbrake and lift up the centre console.
Center console (models from 1996)
Remove the negative terminal from the battery.
On manual transmission models, remove the shift knob, protective boot and holder. On automatic transmission models, place the shift lever in the "P" position. Unscrew the shift knob from the shift lever, then use a pry bar to remove the gear indicator scale and holder.
Remove the switches from the back of the center console and disconnect the electrical connectors from them. Tighten the handbrake all the way and remove the protective cover from it.
Unscrew the 4 nuts and remove the gearshift lever cover with the mounting plate. Open the lid of the storage compartment at the rear of the center console and unscrew the screw at the bottom of the compartment.
Remove the center console along the handbrake lever and gear shift lever and remove it from the vehicle.
Installation
Installation is carried out in the reverse order of removal.