Bosch Ignition Distributor
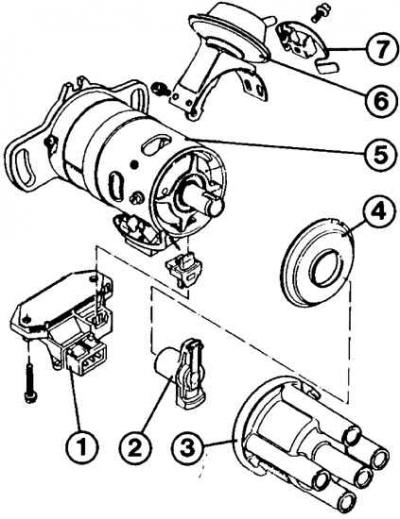
1 – switch; 2 – distributor rotor; 3 – lid; 4 – anther; 5 – body; 6 – vacuum regulator; 7 – lid holder
Lucas Ignition Distributor
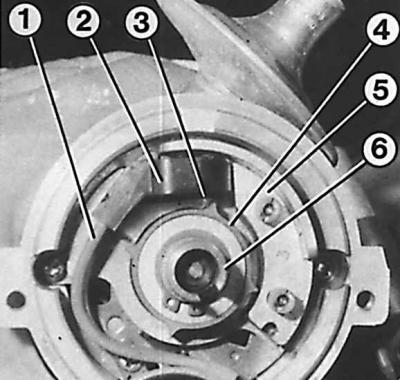
1 – wire from the sensor; 2 – sensor; 3 – magnet; 4 – control rotor; 5 – stator; 6 – distributor shaft
Bosch Ignition Distributor
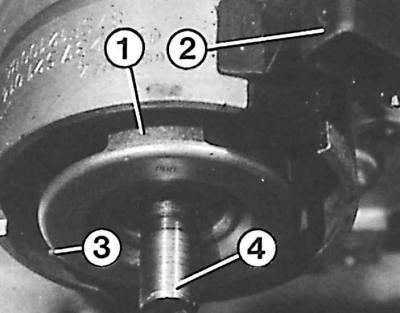
1 – rotor; 2 – connector; 3 – pulse sensor; 4 – shaft
Bosch distributor pulse sensor
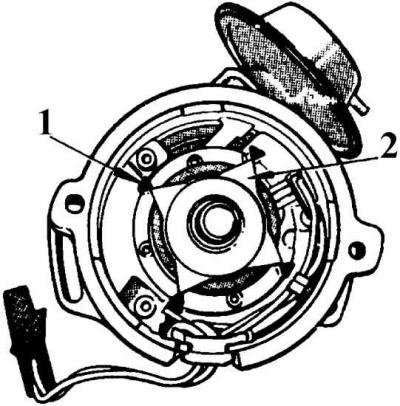
1 – stator; 2 – control rotor
Lucas Distributor Pulse Sensor
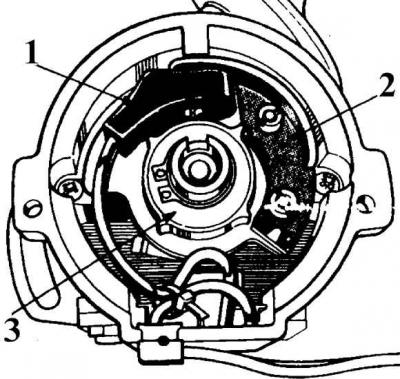
1 – sensor; 2 – stator; 3 – control rotor
The order of connecting high-voltage wires
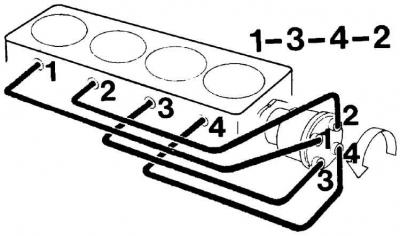
CVH Engine Ignition Timing Marks
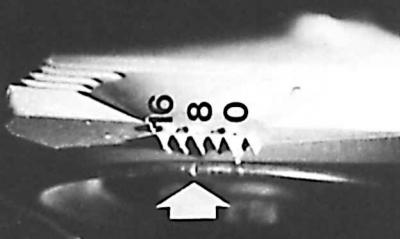
The marks are indicated by an arrow.
Removal and installation
1. Remove the ground wire from the battery.
2. Unscrew the distributor cover mounting screws and remove it together with the high-voltage wires.
3. Remove the wire connector and the ignition timing control vacuum tube from the distributor.
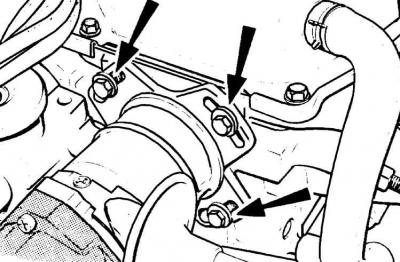
4. Unscrew the three distributor mounting bolts and remove it.
5. Remove the distributor rotor by pulling it outward.
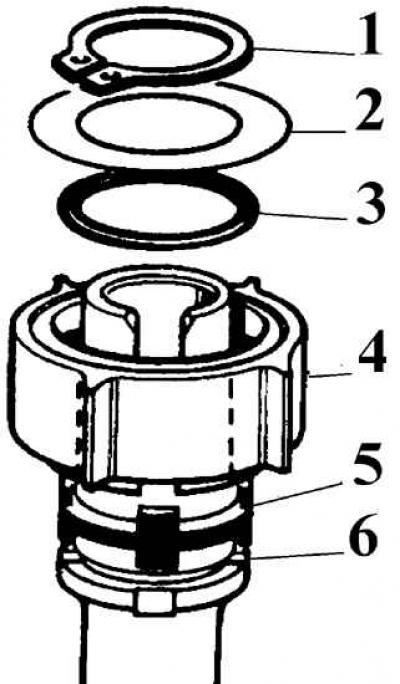
6. After removing the protective plastic casing, access to the pulse sensor is opened. The control rotor (4) is attached to the shaft using a spring retaining ring (1) (2 - washer, 3 - sealing ring, 5 - ring with projections, 6 - grooves on the distributor shaft).
7. To remove the vacuum advance regulator, remove the support plate, which is secured with three screws, and the regulator rod retaining ring.
Caution! In the Lucas ignition distributor, do not under any circumstances unscrew the screw securing the permanent magnet.
 |
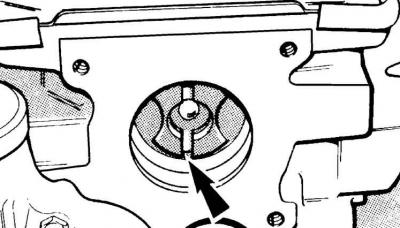 |
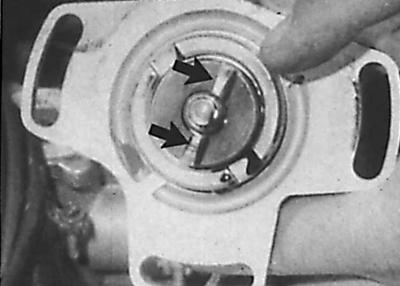
8. When installing the distributor, align the mounting protrusions on the distributor drive flange (figure on the left) with the grooves on the end of the camshaft (figure on the right), which are offset to install the distributor shaft in only one position.
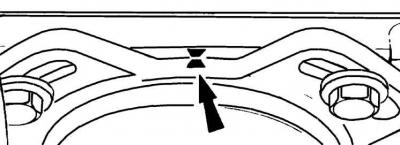
9. The marks (indicated by arrows) on the cylinder head and ignition distributor must also be aligned.
10. After installing the ignition distributor, check and, if necessary, adjust the ignition timing. The ignition timing is adjusted by turning the distributor around its axis with the distributor mounting bolts loosened.
(This publication was borrowed from the website: www.FordBook.ru)