Contents: Removal. Front bumper of cars… ↳ Front bumper of cars produced since… ↳ Rear bumper ↳ Rear composite bumper ↳ Installation ↳
Removal. Front bumper of cars produced before 1996
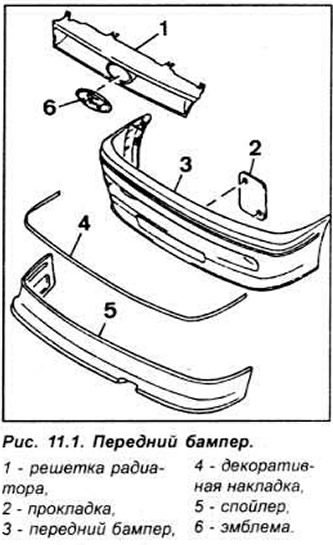
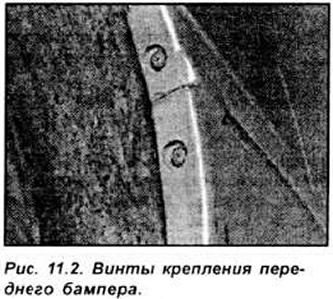
Remove the radiator grille. Raise the front of the car and secure it on stands. Release the 6 fasteners and 2 clamps and remove the mudguard from the underside of the car. The 6 fasteners are clamps or plastic screws that can be pryed or unscrewed. Unscrew the 2 screws securing the bumper to the wing on both sides at the rear of the bumper (see Fig. 11.2).
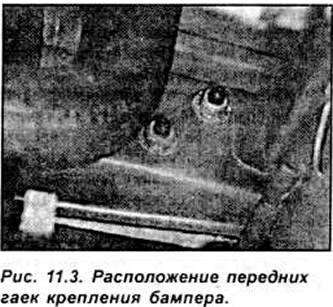
Unscrew the 4 nuts (2 on each side) securing the bumper to the front of the car (see Fig. 11.3). Disconnect the electrical wires from the bulbs located in the bumper.
Using an assistant, push the bumper forward of the vehicle and remove it.
Front bumper of cars produced since 1996
Remove the radiator grille. Tie the radiator to the front panel to keep it in place during the following steps. Raise the front of the car and secure it on stands. Unscrew 5 screws on each side and remove the left and right wheel arch liner extensions.
Release the hose from the right radiator support. Unscrew 2 bolts on each side and remove the left and right radiator supports. Unscrew 2 screws on each side. securing the edge of the bumper to the wheel arch.
Disconnect the wires going to the bulbs installed in the bumper.
Remove the 4 nuts (2 on each side) securing the bumper to the front of the vehicle.
With the help of an assistant, pull the bumper forward away from the vehicle and remove it.
Rear bumper
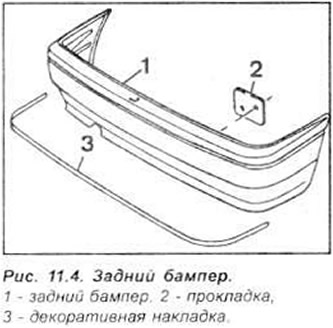
Using a lever, remove the license plate light and disconnect the electrical connector.
Unscrew the 2 screws securing the front ends of the bumper to the wheel arch on each side (see Fig. 11.5).

Remove the trunk trim to access the bumper mounting nuts.
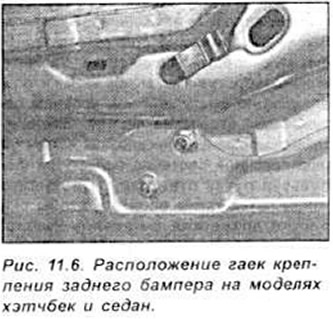
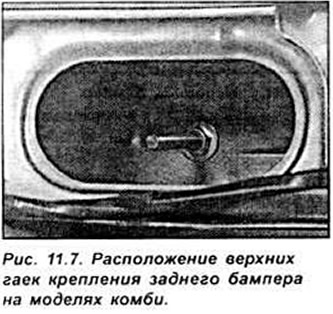
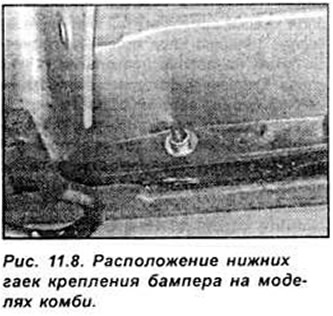
Unscrew the nuts securing the rear bumper to the panel on each side. The bumper mounting nuts are located either underneath the vehicle or inside the luggage compartment, depending on the model. With the help of an assistant, pull the bumper away from the vehicle and remove it (see Fig. 11.6-11.8).
Rear composite bumper
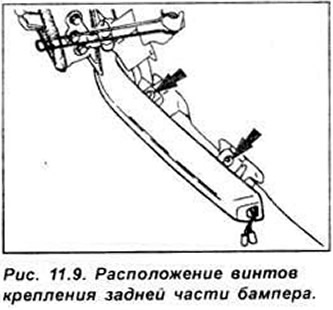
From under the bumper, squeeze the brackets securing the license plate light and remove the light from the bumper. Disconnect the electrical connector from the light. Unscrew the 2 Torx screws located between the bumper and the rear of the car and remove the bumper (see Fig. 11.9).
Installation
Installation is performed in the reverse order of removal. Before tightening the nuts and screws, check the alignment of the bumper relative to the body. On the rear bumpers, check the functionality of the license plate light.
(The original can be found on the specified resource: FORDBOOK)