Contents: Inspection ↳ Replacement ↳
Inspection
1. Transmission mounts rarely require attention, but if broken or damaged, they should be repaired immediately as additional stress on driveline components is undesirable.
2. During the inspection, the gearbox should be slightly raised to relieve the load on the supports.
3. With the parking brake applied, jack up the front of the vehicle and support it on jack stands. With the jack under the transmission, carefully jack it up slightly to relieve the load on the jack stands.
4. Inspect the mounts, looking for areas where the rubber is cracked, hardened, or separated from the metal components. The rubber often cracks in the center.
5. If any signs of deterioration are detected, the support should be replaced.
Replacement
6. If not already done, apply the parking brake, jack up the front of the vehicle and support it on stands. Place a jack under the transmission, then carefully jack it up no more than necessary to relieve the load on the mount.
7. Unscrew the central bolt (gearboxes of types G and N) or two nuts (mT75 gearbox) fastening supports of the gearbox to the gearbox itself (see Figure 6.7).
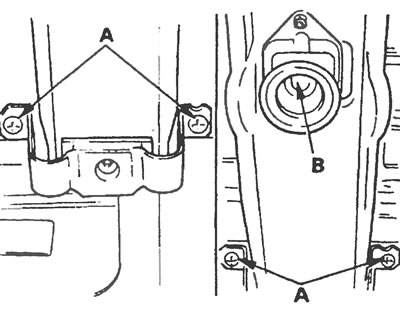
Figure 6.7. Gearbox mounting parts: A - Bolts securing the cross beam to the bottom, B - Bolt securing the gearbox to the support.
8. Unscrew the two bolts on each side and remove the transmission cross member, then unscrew the two nuts or two bolts and separate the support from the cross member.
9. Install the new mount onto the crossmember and install the crossmember onto the vehicle in the reverse order of removal. Please note that on some models the crossbar is asymmetrical and must be installed with the red paint mark facing the front of the vehicle.
10. Lower the vehicle to the ground when finished.