Contents: Removal ↳ Installation ↳
Note: Please refer to the warnings given in section 1 before starting work.
Removal
1. Disconnect the negative battery cable.
2. Drain the coolant and remove the radiator as described in section 4.
3. Remove the cooling fan clutch as described in section 5.
4. Remove the water pump and alternator drive belt as described in Chapter 1.
5. Remove the timing belt cover as described in Chapter 2A.
6. Unscrew the six bolts and remove the water pump from the engine (see Figure 8.6). Note the positions of the retaining bolts as they are different sizes.
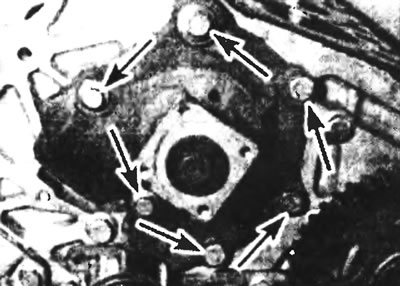
Figure 8.6. Remove the water pump by unscrewing the six bolts.
7. The water pump is not usually repaired, and therefore if it is faulty or noisy, it must be replaced.
Installation
8. Clean the mating surfaces of the cylinder block and water pump. Make sure they are clean and dry.
9. Using a new gasket, place the water pump onto the coupling plate. Insert the retaining bolts into their original positions and tighten them gradually, in a diagonal sequence, to the specified tightening torque.
10. Reinstall the timing belt cover, drive belt, fan clutch and radiator as described in the relevant sections and chapters of this manual.
11. Refill the cooling system with fluid, reconnect the battery, start the engine, and check for leaks.