Contents: Removal ↳ Installation ↳
Removal
1. It is recommended that the removal and installation of the anti-roll bar and its connecting rods be carried out on a vehicle that is freely standing on all wheels, therefore, if possible, place the vehicle on an inspection pit or overpass.
2. To remove the anti-roll bar, unscrew the fixing bolts on both sides, disconnect the anti-roll bar from the cross beam, and then, unscrew the fixing nuts of the rods, remove it from the suspension arms together with the connecting rods (see figure 10.2,a,b).
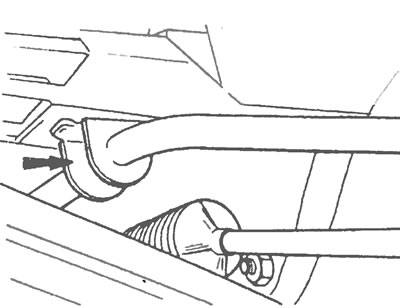
Figure 10.2,a. Fastening the anti-roll bar to the body (the arrow shows one of the clamps).
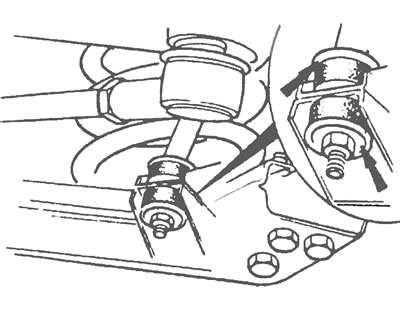
Figure 10.2,b. Fastening the anti-roll bar connecting rod. Remember that disc washers (indicated by arrows) must be facing the bushings with the convex side inward.
3. The connecting rods can be separated from the anti-roll bar, if necessary, by pulling out the spring clips on both sides and knocking out the rods with a punch or drift. You can also use a small puller. Please note that the ends of the anti-roll bar have two flats which should be placed approximately parallel to the threaded end of the tie rod when placing the tie rod on the anti-roll bar, after which the rod can be secured with a spring clip (see Figure 10.3).
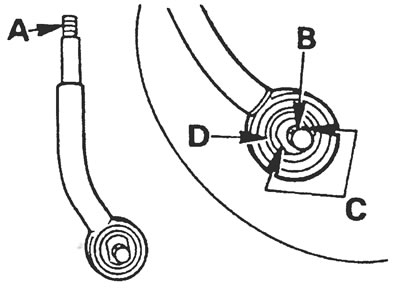
Figure 10.3. Anti-roll bar connecting rod parts: A - Threaded end of the rod, B - Stabilizer pin, C - Flats, D - Inner bushing.
4. Inspect the rubber bushings of the anti-roll bar and tie rod cushions and replace them with new ones if they are damaged or worn. To remove the tie rod cushion from the lower control arm, either cut it in half or pry it out with a large screwdriver or something similar.
5. When installing the tie rod cushion on the suspension arm, first treat the cushion itself and its location on the suspension arm with a cleaning agent, then insert an M8x70 mm bolt with a flat washer into the cushion. Insert the cushion and bolt into a 25mm socket or a suitable sized piece of pipe (see figure 10.5, a, b). After inserting the bolt into the eye, pull on the bolt with pliers, thereby pulling the cushion through the eye and into the lever. When pulling the sleeve, press the socket (or a piece of pipe) to the lever. Once the bushing is inserted, remove the bolt and then replace the bushing on the opposite side of the car in the same way (it is not advisable to replace the bushing with a new one on only one side).
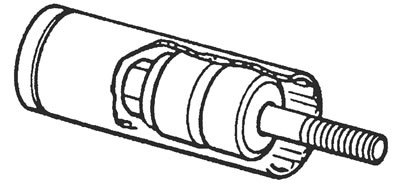
10.5,a. The location of the sleeve mounted on the bolt inside the pipe.
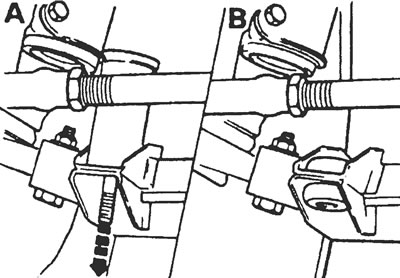
Figure 10.5,b. Installing the connecting rod bushing: A - Installation of the sleeve mounted on the bolt, B - Installed sleeve.
6. When installing new anti-roll bar bushings, first fit the left bushing over the mounting tab on the anti-roll bar. Then install the right bushing onto the stabilizer and make sure that both bushings face the cross beam with their flat surfaces.
Installation
7. Once the anti-roll bar is positioned in its location, place the mounting clamps on it, inserting the clamp tongues into their grooves in the cross member. Insert the retaining bolts and tighten them to the specified torque.
8. Install the anti-roll bar connecting rods on both sides so that the convex side of the disc washers faces the cushions. Install and tighten the retaining nuts.