Contents: Jacking ↳ Towing ↳ Changing wheels ↳ Tire pressure ↳ Winter tires ↳ Anti-skid chains ↳ Recommended pressure (in cold tires) ↳
Jacking
The jack included in the tool kit supplied with the vehicle should only be used for changing wheels (see subsection "Changing wheels"). When performing any other type of work that requires lifting the vehicle, use a hydraulic jack and always support the vehicle with axle stands placed under the vehicle's jacking points, chassis, or axles. Make sure the jack has enough power to safely lift and secure the vehicle.
When using a hydraulic jack, place the head under one of the jacking points, or directly over the center of the front or rear axle, or the front crossmember (see illustration). Raising the rear of the car (for any reason), do not jack up the vehicle at one point on the center of the axle if the vehicle is fully loaded. Do not raise the vehicle higher than necessary. Never work on or near a raised vehicle unless the vehicle is properly supported with axle stands at at least in two points.
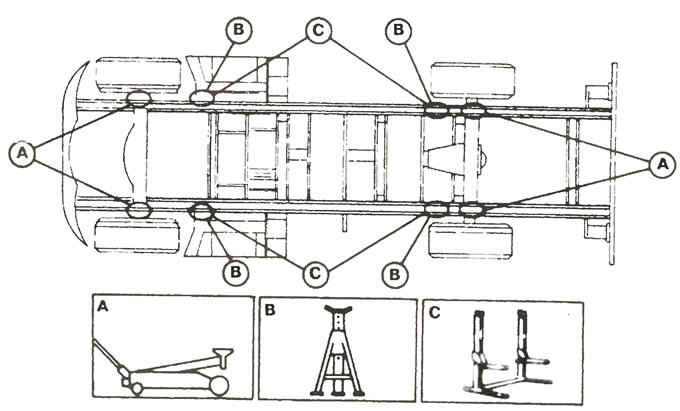
Typical jacking points for a car using garage equipment. Shown using a short wheelbase pickup as an example.
Towing
Towing rings are available at both the front and rear of your vehicle (see illustrations). When towing, the ignition key must be turned to position II so that the steering is unlocked and the turn signals, horn and brake light operate. On models with automatic transmissions, the gearshift lever must be set to the "neutral" position N, and the towing speed must not exceed 50 km / h, provided that the towing distance is not more than 50 km. To tow a longer distance, remove the driveshaft or tow the vehicle with the rear end raised
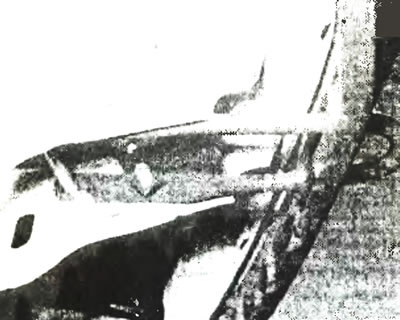
Front towing eye.
Push starting or towing is not possible on vehicles with an automatic transmission and is not recommended on models with a manual transmission due to the excessively high compression pressures in a diesel engine.
Please note that if the vehicle is being towed and the engine is therefore turned off, the brake booster will not function and additional force will be required to press the brake pedal. When parking another vehicle, attach the towing rope to the towing eyes.
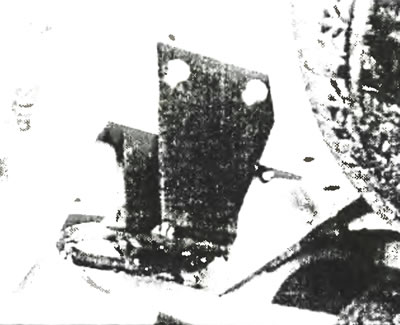
Rear towing eye.
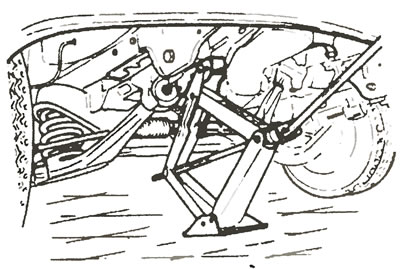
Jack location when jacking up the front of a vehicle on short wheelbase models.
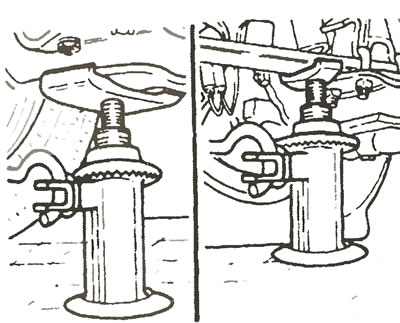
Jack location when jacking up the front of a vehicle on long wheelbase models.
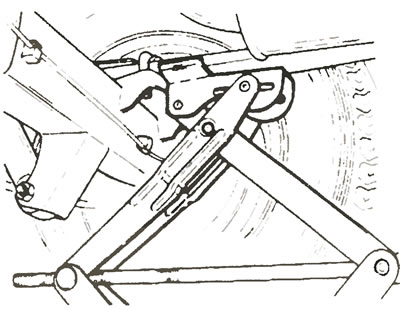
Jack location when jacking up the rear of a vehicle on short wheelbase models.
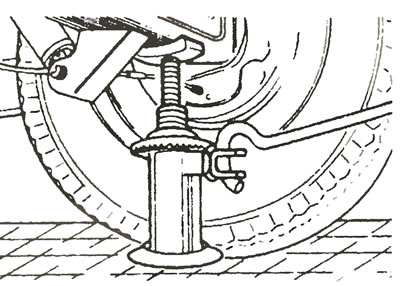
Jack location when jacking up the rear of a vehicle on long wheelbase models.
Changing wheels
To change a wheel in an emergency, use the jack that comes with the car. Before jacking up your vehicle, make sure the wheel nuts are loosened but not removed. When changing a wheel on a pre-1992 vehicle that has six-stud wheels, note that the lug nuts on the left side of the vehicle are left-hand threaded, meaning they unscrew clockwise. These nuts and their corresponding studs are marked with the letter L.
The type of jack supplied with your vehicle, as well as its location, depends on the model. Short wheelbase models are supplied with a scissor jack which should be positioned as shown in the illustrations when jacking up the vehicle. Long wheelbase models are supplied with a heavy duty stand jack or scissor jack which should be positioned as shown in the illustrations when jacking. On later models, the jack head engages specific recessed areas on the door sill panel. When jacking up under a spring, place the jack as close to the axle as possible. Make sure the jack is fully engaged before attempting to lift the vehicle. Whenever possible, try to jack up your vehicle on a hard, level surface. With the handbrake fully applied, engage reverse gear (or move the lever to position P on models with automatic transmission). Block the wheels on the side opposite to the side being lifted.
When changing a wheel, lightly tighten the nuts, lower the vehicle to the ground, and then tighten the nuts fully. Check the tightening torque of the wheel nuts with a torque wrench at the first opportunity. Repair a punctured tire as soon as possible (if possible).
Tire pressure
Tire pressure should be checked when the tires are cold, i.e. before driving. Don't forget to check the spare tire.
Winter tires
Always install winter tires on all four wheels. Do not exceed the manufacturer's maximum speed.
Winter tires must be maintained at the manufacturer's pressure.
Anti-skid chains
Use chains with small links. Do not exceed 50 km/h. Remove chains immediately on snow-free roads.
Recommended pressure (in cold tires)
| Machine type | Body | Tire size | Partially loaded.* Bar (kg/cm²) | Full load** Bar (kg/cm²) | ||||
| front. | back. | front. | back. | |||||
| BOS | diesel | van or combi | 185 R 14 REIN 185 R 14C 8PR | 3.4 3,4 | 2,4 2,6 | 3.4 3,4 | 2.8 3.1 | |
| 100S | diesel | van or combi | 185 R 14C 6PR 185 R 14C 8PR | 3.4 3.4 | 2.8 2,8 | 3,4 3,4 | 3,6 3,6 | |
| 120S | diesel | van, combi or chassis | 195 R 14C 6PR 195R14C8PR | 3,4 3,4 | 3,0 3.0 | 3.4 3.4 | 3.6 3,6 | |
| 150S | diesel | van or combi | 215/70 R 15C 8PR | 2.7 | 3.4 | 2,7 | 4,2 | |
| 150S | diesel | chassis | 225/70 R 15C 8PR | 2.1 | 3.0 | 2,1 | 3.6 | |
| 100L | diesel | van, combi or chassis | 195 R 14C 6PR | 3.3 | 3.0 | 3.3 | 3.6 | |
| 100L | turbodiesel | van, combi or chassis | 225/70 R 14C 6PR | 2.6 | 2.4 | 2.6 | 2.8 | |
| 150L | diesel | van, combi or chassis | 225/70 R 15C 6PR | 2,8 | 3.0 | 2.8 | 3.6 | |
| 190L | diesel | van, combi or chassis | 225/70 R 15C 8PR | 2.8 | 3.4 | 2,8 | 4,3 | |
| 190 | diesel | double cab chassis | 185 R 15C 6PR | 3.8 | 2.6 | 3.8 | 2.6 | |
| 190 EF | diesel | double cab chassis | 185 R 15C 6PR | 3.3 | 3.2 | 3.3 | 3.2 | |
| 9-seater petrol or diesel | bus | 185 R 14C 6PR 185 R 14C 8PR | 3.4 3,4 | 3.1 3.6 | 3,4 3.4 | 3,1 3,1 | ||
| 12-seater petrol or diesel | bus | 195 R 14C 6PR 195 R 14C 8PR | 3.4 3.4 | 3.0 3.0 | 3.4 3.4 | 3,0 3,0 | ||
| 15 seats petrol or diesel | bus | 195 R 14C 6PR 195 R 14C 8PR | 3.4 3.4 | 3.6 3.6 | 3,4 3,4 | 3,6 3,6 | ||
| LCY gasoline LCY diesel | bus bus | 225/70 R 15C 6PR 225/70 R 15C 6PR | 2.6 2.8 | 3.6 3.6 | 2.6 2.8 | 3,6 3,6 | ||
* The indicated pressure should be used with the machine partially loaded (up to 50% of the lifting capacity)
** The stated pressure should be used when the machine is fully loaded (over 50% of the lifting capacity).