Contents: Headlights ↳ Front direction indicator ↳ Side direction indicator ↳ Tail light ↳ Pickups ↳ Rear license plate light ↳ Pickups ↳
Headlights
Models before 1992
1. Remove the front turn signal as described later in this Section.
2. Remove the protective cover from the back of the headlight and disconnect the headlight multi-pin plug.
3. Unscrew the parking light bulb socket counterclockwise and remove it from the headlight assembly.
4. Using suitable pliers, turn the two plastic headlight clips a quarter turn. Remove the headlight assembly from the upper mountings and unhook it from the lower adjuster (see figure 16.4, a, b).
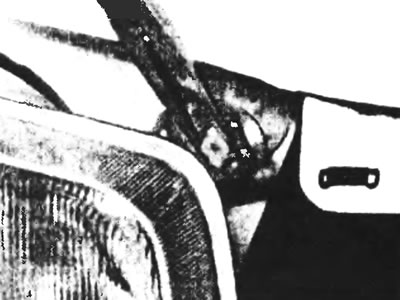
Figure 16.4,a. On early models, turn the two plastic headlight clips a quarter turn...
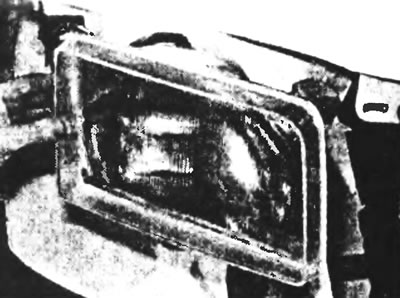
Figure 16.4, b.... remove the headlight from the upper mounts and unhook it from the lower regulator.
5. Installation is carried out in the reverse order of removal. A detailed description of the procedure for adjusting the low beam headlights is given in Section 13. Check the operation of the headlights and indicators upon completion.
Models since 1992
6. Disconnect the multi-pin connector at the rear of the turn signal unit, release the indicator assembly retaining spring, and remove the headlight.
7. Remove the radiator grille as described in Chapter 11.
8. Remove the protective cover from the back of the headlight and disconnect the headlight multi-pin connector.
9. Unscrew the parking light bulb socket counterclockwise and remove it from the headlight.
10. Unscrew three bolts and one nut and remove the headlight (see Figure 16.10).
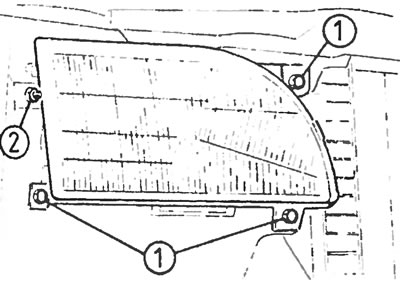
Figure 16.10. On recent models, unscrew three bolts (1) and one nut (2), remove the front headlight.
11. Installation is carried out in the reverse order of removal. A detailed description of the procedure for adjusting the low beam headlights is given in Section 13. Upon completion, check the operation of the headlights and indicators.
Front direction indicator
Models before 1992
12. Unscrew the turn signal bulb socket counterclockwise and remove it.
13. Press the plastic lock tab on the top of the indicator to one side and then use a suitable screwdriver to pry it out. Remove the indicator (see Figure 16.13).
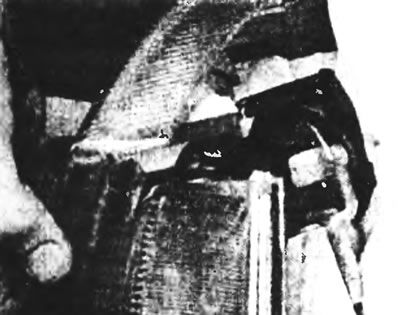
Figure 16.13. Removing the front direction indicator on early Ford Transit Diesel models.
14. Installation is carried out in the reverse order of removal. Once completed, check the operation of the light bulb.
Models since 1992
15. Unscrew the turn signal bulb socket counterclockwise and remove it.
16. Release the indicator retaining spring and remove it.
17. Installation is carried out in the reverse order of removal. Once completed, check the operation of the light bulb.
Side direction indicator
18. Remove the bulb holder from the back of the indicator, then either press the retaining tabs or turn it clockwise (according to the method of installing the unit) and take it off.
19. Install in the reverse order of removal. Check the operation of the unit after installation.
Tail light
Minibuses and vans produced before 1992
20. Remove the hinged cover (if installed) from the rear corner of the body to gain access to the rear light assembly.
21. Unscrew the three plastic wing nuts securing the tail light to the body.
22. Remove the headlight assembly as far as possible, then use a screwdriver to lift up the lower plastic socket (see Figure 16.22).
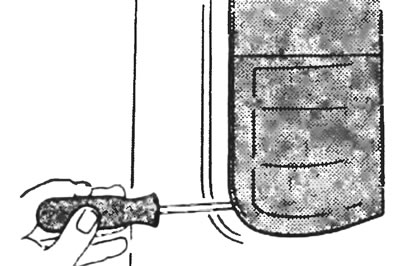
Figure 16.22. After pulling the rear light assembly out as far as possible, use a screwdriver to lift up the lower plastic socket.
23. Disconnect the multi-pin connector and remove the rear light assembly.
24. Installation is carried out in the reverse order of removal. Check the operation of all the lamp bulbs after installation.
Minibuses and vans produced since 1992
25. Remove the hinged cover (if installed) from the rear corner of the body to gain access to the block.
26. Unscrew the three plastic wing nuts securing the tail light to the body.
27. Remove the rear light assembly and disconnect the multi-pin connector.
28. After removing the unit, squeeze the lower retaining tabs of the bulb holder and separate the bulb holder from the diffuser at the bottom. After this, by squeezing the upper fixing tabs, remove the bulbs from the diffuser.
29. Install in the reverse order of removal. Check the operation of all lamps in the flashlight after its installation.
Pickups
30. Disconnect the tail light assembly wiring harness from the clamp on the rear cross member, then disconnect the multi-pin plug from the braid.
31. Remove the two nuts from the posts at the rear of the taillight assembly.
32. Move the taillight slightly to the side and forward so that the two posts and the retainer become visible. Remove the wiring harness from the cross member and remove the light.
33. Install in the reverse order of removal. Check the operation of all lamps in the flashlight after its installation.
Rear license plate light
Models with double rear doors
34. Turning to Chapter 11, Section 9, remove the rear door interior trim panel.
35. Press the tabs on the multi-pin connector together and push the light assembly out of the tailgate.
36. Disconnect the multi-pin plug and remove the backlight assembly.
37. Install in the reverse order of removal. Check the operation of the unit after its installation.
Models with a tailgate
38. Turning to Chapter 11, Section 9, remove the rear door interior trim panel.
39. Disconnect the two multi-pin connectors at the rear of the backlight assembly and unscrew the four backlight assembly retaining nuts.
40. Remove the light assembly from the rear door.
41. Install in the reverse order of removal. Check the operation of the unit after installation.
Pickups
42. Separate the lamp cover with lenses from the license plate light unit.
43. Disconnect the multi-pin plug at the rear cross member braided connection.
44. Remove the rubber cover of the backlight unit from the crossbar, slide the braid and remove the unit.
45. Install in the reverse order of removal. Check the operation of the unit after installation.