Contents: Removal ↳ Installation ↳
Removal
1. Disconnect the multi-plug and washer hose from the pump on the reservoir (see Figure 21.1).
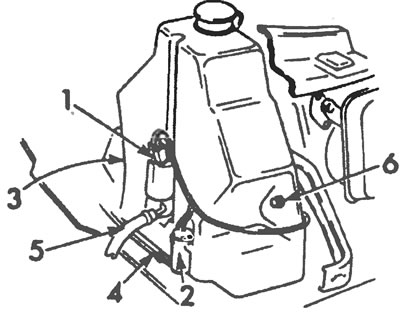
Figure 21.1. Detailed view of the windshield and headlight washer reservoir: 1. Headlight washer pump, 2. Windshield washer pump, 3. Mounting bolt, 4. Windshield washer hose, 5. Headlight washer hose, 6. Mounting bolt.
2. On recent models, remove the reservoir cap under the fender arch in front of the front bumper reinforcement bar (see Figure 21.2).
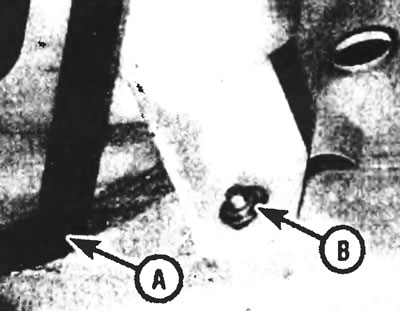
Figure 21.2. Fastening the washer reservoir under the wheel arch on recent models: A - Front bumper reinforcement rod, B - Lower fixing bolt.
3. Unscrew the fixing bolts and remove the tank.
4. If required, the headlight washer pump or windshield washer pump can be removed from the reservoir by prying them up with a screwdriver or other suitable lever. After removing the pump, remove its seal.
Installation
5. Installation is carried out in the reverse order of removal. If you removed the pump seal, lubricate it with a little cleaning fluid to make the installation process easier. On early models, after installing the reservoir, insert the reservoir locating pin into the body side member hole.
6. When finished, fill the reservoir with water or cleaning solution and check that the washers are working properly. Check for leaks.
[The original article can be viewed on the portal: FordBook]