Contents: Removal ↳ Installation ↳
Removal
Roof mounted antenna
1. Contact Chapter 11 and, if necessary, remove the interior trim of the cabin ceiling to gain access to the rear of the antenna.
2. Working from outside the vehicle, pry the antenna retaining nut cover off, unscrew the nut and remove the washer (see Figure 25.2).
3. Separate the antenna with the gasket from the guide pin.
4. To remove the antenna wire, pull out the radio or stereo (see Section 23) and disconnect the antenna wire from it.
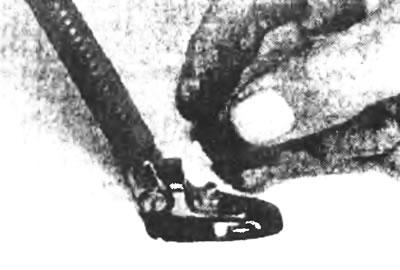
Figure 25.2. Using a hook, remove the cover of the roof-mounted antenna fixing nut, unscrew the nut and remove the washer.
5. The antenna with the wire can now be removed from the car. Because the antenna wire goes through the front pillar (windshield pillar), it is advisable to remove the trim and/or attach a piece of strong cord to the end of the wire and pull out the wire, then separate the cord. Leave the cord in this position so that you can reattach it to the wire and pull the conductor back along the old path.
Side mounted antenna
6. This type of antenna is usually mounted on a Luton type body to improve reception. First, remove the radio or stereo (Section 23) and separate the antenna wire from the back of the unit.
7. Then unscrew the bolt securing the antenna base and, separating the antenna from the mount, pull out the wire. After moving the antenna down, separate it from the upper holder, then remove the antenna with the wire (see Figure 25.7).
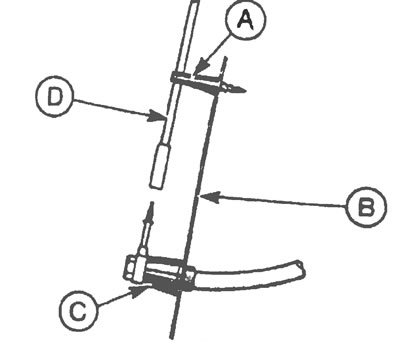
Figure 25.7. Antenna mounting details for the side of the vehicle: A - Upper antenna mount, B - Car body, C - Antenna base, D - Antenna.
Installation
8. Installation is carried out in the reverse order of removal. Make sure the antenna wire does not touch any moving parts.