Contents: Removal ↳ Installation ↳
Removal
1. Remove the wiper motor with the drive mechanism as described in the previous section. Disconnect the drive mechanism ball joints by prying the ball joint bearings with a fork-type wrench and removing them from the ball studs. Remove the felt washers, marking their installation locations.
2. To remove the Deico type casing, it is necessary to drill holes with a diameter of 6.5 mm and a depth of 10 mm at the marked points on the sides of the casing, and then separate the casing from the pipe (see Figure 20.2).
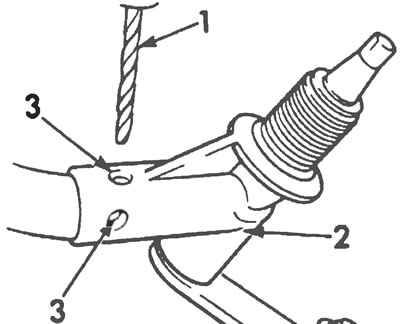
Figure 20.2. Removing the plastic cover of the Deico type windshield wiper arm pivot axis: 1. Drill (with a drill bit 0 6.5 mm), 2. Windscreen wiper arm pivot shaft housing, 3. Drilled holes 10 mm deep.
3. To remove the SWF type casing, carefully cut off the heads of two rivets in the places shown in the figure, and then pull out the rivets with a suitable tool with a thin tip (see Figure 20.3) and separate the casing from the pipe.
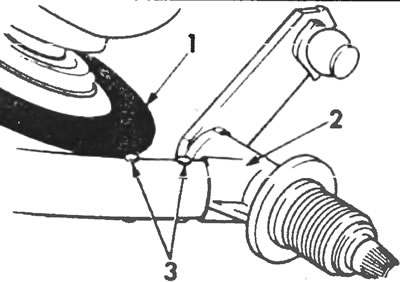
Figure 20.3. Removing the steel casing of the SWF wiper arm pivot shaft: 1. Grinding disc, 2. Wiper arm pivot shaft housing, 3. Protruding rivet heads.
Installation
4. Regardless of the type of casing, to reinstall it, slide the casing onto the pipe until it engages with the groove at the end of the pipe. If necessary, lightly tap the housing with a plastic hammer to adjust the locking pin or rivet holes (depending on the type of casing).
5. Install new rivets or suitable roll pins to secure the housing. When installed correctly, the pins should protrude from both sides.
6. After connecting the drive rod to the pivot axis, install the windshield wiper motor as described in previous Section.