Warning: Hydraulic fluid is toxic: If the fluid comes into contact with your skin, wash the affected area immediately; and seek medical attention if necessary if liquid gets into your mouth or eyes. Some types of brake fluid are flammable and may ignite on contact with hot components. When servicing the hydraulic system, you must take precautions against possible ignition, just as if you were working with gasoline. Hydraulic fluid also removes paint and corrodes plastics; if it spills, wash it off immediately with plenty of clean water. Finally, brake fluid is very hygroscopic (i.e. it absorbs moisture from the air). When the fluid absorbs a large amount of moisture, the boiling point drops, leading to a dangerous "loss of brakes" during sudden braking. Old fluid may become contaminated and unsuitable for further use. When refilling or replacing fluid, use only the recommended type of fluid from a freshly opened, sealed container.
1. After disconnecting or connecting the master cylinder or brake pipes and hoses, the entire system (i.e. both contours) must be pumped out of air. When removing or installing an element of only one circuit, only that circuit must be bled.
2. When bleeding both circuits with a vertical separation of the circuits, bleed the front brakes first, then the rear ones. When splitting circuits diagonally, bleed one front brake with the diagonally opposite rear brake first, then bleed the other front brake with the remaining rear brake.
3. When bleeding the brakes on models with a load distribution valve in the rear brake circuit, it is important to place the car on its wheels, otherwise the load distribution valve will not allow the system to bleed completely.
4. Currently, there are various types of kits available for self-bleeding of brakes. We recommend that you use one of these kits whenever possible, as they make bleeding the hydraulic brake circuit much easier. Follow the kit manufacturer's instructions, paying attention to the following recommendations.
5. When bleeding, do not allow the brake fluid level in the reservoir to drop below the minimum mark, and use only fresh fluid for refilling. Never fill the system with used fluid.
6. Before starting work, make sure that all pipes and hoses are in good condition and all hydraulic system connections are tight. When working, exercise extreme caution and do not allow brake fluid to come into contact with the painted surfaces of the vehicle, otherwise the car enamel will be seriously damaged. Wash surfaces immediately with cold water to remove any spilled liquid.
7. If a brake bleeding kit is not available, obtain a clean can, plastic or rubber tubing of suitable length to fit tightly over the bleed screw, and a new can of specified brake fluid (see "Lubricants, liquids and containers" at the beginning of this guide).
8. Clean the surface around the nipple on the brake that needs to be bled (it is important to prevent dirt from getting into the hydraulic system), remove the boot (see Fig. 2.8a,b). After connecting one end of the tube to the fitting, lower the other end into a jar that contains enough brake fluid so that the tube is immersed in the liquid. The can must be placed at least 300mm (12 inches) above the nozzle when performing the procedure. On some vehicles, the front brake calipers have multiple bleed nipples. In this case, connect the drain tubes to all fittings and carry out the described procedures for each of them.
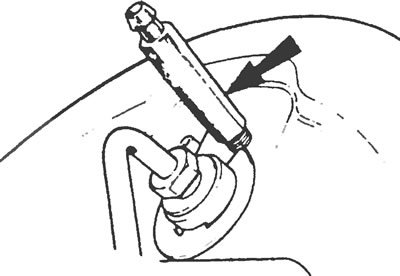
Figure 2.8,a. External appearance of the fitting (indicated by the arrow) on the rear brake cylinder.
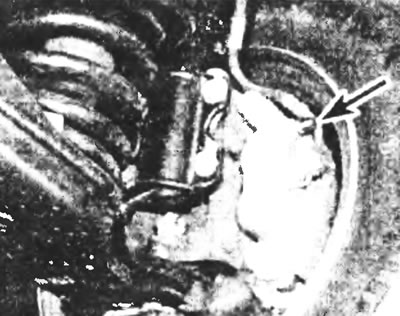
Figure 2.8,b. Nipple with dust cap (indicated by the arrow) on the front brake caliper.
9. After loosening the nipple approximately one turn, ask an assistant to press the brake pedal. Tighten the nipple after the piston moves down, thereby preventing the removed air from returning, then ask the assistant to release the pedal. Pause briefly at the end of each pedal stroke to allow the master cylinder to recover before depressing the pedal, then continue bleeding until clean, air-free brake fluid flows into the jar, then fully depress the pedal and tighten the bleed screw securely.
10. After removing the tube, install the boot in place and repeat this procedure on the other brake of the same circuit.
11. Repeat the procedure on the remaining contour.
12. On vehicles with a brake pressure control valve in the rear circuit, the brakes must be bled separately, through the nipple for connecting the brake pipes on the valve. With an assistant pressing the brake pedal, carefully loosen the nut on the line fitting. When brake fluid appears, tighten the nut.