SEQUENCE OF WORKS
1. Disconnect the cable from the negative terminal of the battery.
2. Remove the five screws and remove the lower steering column cover.
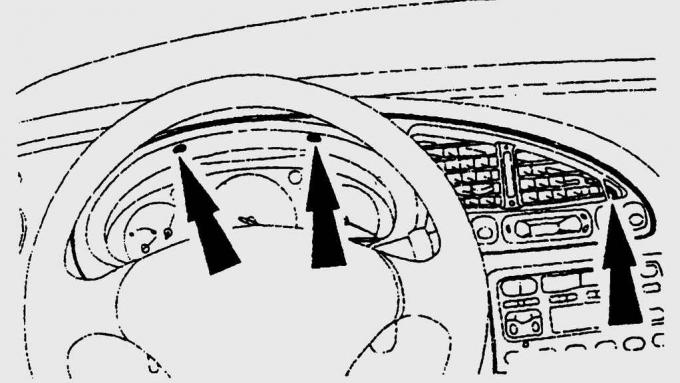
Fig. 15.32. Location of instrument cluster trim mounting screws
3. Remove the instrument cluster trim mounting screws (Fig. 15.32). First, carefully remove the plugs covering the screws with a screwdriver. To avoid scratching the trim, place a clean rag under the screwdriver.
4. Carefully pull the released trim forward and release the clips on the bottom of the trim.
5. Disconnect the electrical connectors for the rear and windshield defrosters, clock, rear fog lights and headlights.
6. Remove the instrument cluster cover.
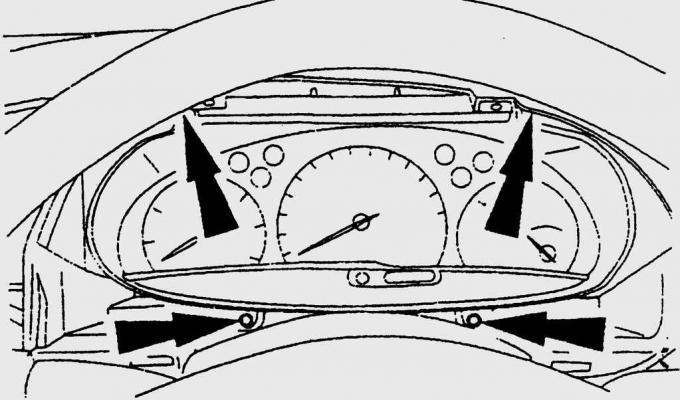
Fig. 15.33. Location of instrument cluster mounting screws
7. Remove the four screws securing the instrument cluster (Fig. 15.33).
8. Carefully pull the instrument cluster forward and disconnect the speedometer drive cable (if necessary, first pull the cable into the passenger compartment through the engine compartment bulkhead).
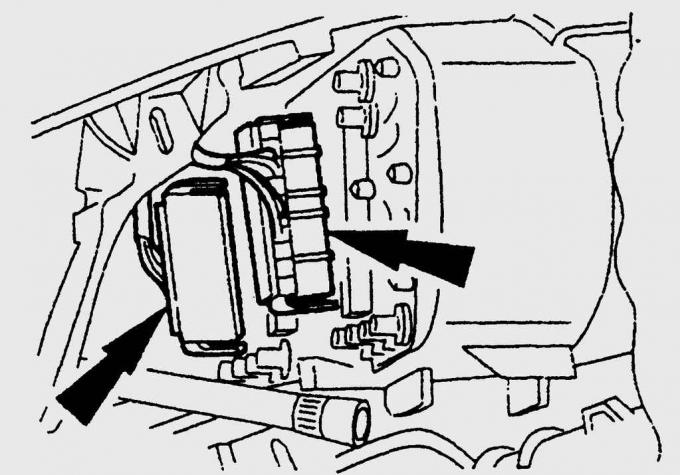
Fig. 15.34. Location of the universal contact connector on the back of the instrument cluster
9. From the back of the instrument cluster, disconnect the universal connector (Fig. 15.34).
10. Remove the instrument cluster from the instrument panel by moving it near the steering wheel.
11. When installing the instrument cluster, make sure that the universal connector and speedometer drive cable are installed correctly.
12. Further installation is carried out in the reverse order of removal.
13. Move the speedometer drive cable into the engine compartment (make sure it is installed correctly).
14. Connect the wire to the negative terminal of the battery, re-enter the erased codes and check the functionality of the devices.
For more information, please visit the website www.fordbook.ru