Removal
1. To remove the tailgate you will need two assistants. Open the side of the vehicle and have someone hold it, then disconnect the license plate light wiring and the multi-pin connector on the body. After pulling the wiring harness through the body, attach it to the tailgate.
2. If equipped, disconnect the rear window washer hoses.
3. Loosen the tailgate hinge bolts, asking two assistants to support it (see Figure 17.3).
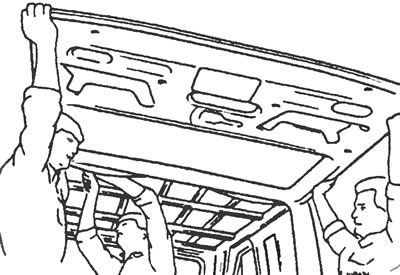
Figure 17.3. Hold the tailboard during removal and installation.
4. Hook the clips securing the ball joints of the tailgate pillars and remove the joints from the pins. Make sure to lift the clamps no more than 4 mm.
5. Unscrew the hinge bolts and remove the tailgate (see Figure 17.5).
6. If necessary, you can also remove the seal from the rear side.
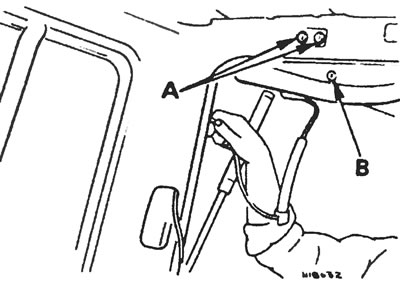
Figure 17.5. Bolts securing the tailgate hinges to the body (A) and to the side (B). Pull the disconnected wires through the body as shown.
Installation
7. Before installing the seal in place, check that the contact surfaces of the seal and the side are clean. Install the seal in place: first at the corners, then at the middle points between the corners, and then press the seal into place from the middle to the corners.
8. After installing the seal in place, straighten its sealing lip so that it fits onto the side flange. After installing the side panel on the vehicle, it may be necessary to adjust the position of the locking plate so that the side panel closes properly.
9. Installation of the tailgate is carried out in reverse order. Press the ball joints of the struts onto their pins by hand, without using any tools. Please note that the struts are filled with gas and therefore cannot be repaired. When replacing struts, make sure that the new ones are identical to the old ones.
Adjustment
10. After installing the tailgate, check how it closes and, if necessary, adjust its position as follows.
Adjusting the side height
11. Loosen the side hinge bolts and position it at the desired height, taking into account the position of the latch and retainer. When finished, tighten the hinge bolts.
Adjusting the gaps on the sides of the board
12. Loosen the side buffer guides, retaining plate bolts and hinges. Align the side in the opening and tighten the hinge bolts. If necessary, adjust the position of the locking plate as follows. so that the side closes securely. Adjust the position of the side buffer guides so that when the side is closed with the safety latch, they just touch the rubber pads of the side pillars, and when the side is locked, they rest firmly against them (see Figure 17.12).
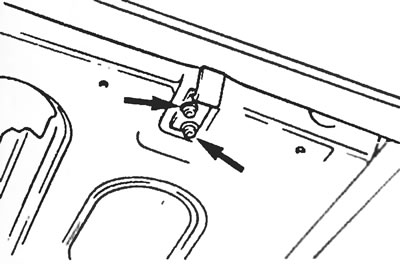
Figure 17.12. Fixing bolts of the side buffer guides of the folding tailboard.