Contents: Removal ↳ Installation ↳
Removal
1. Disconnect the primary wire from the coil (see section 6).
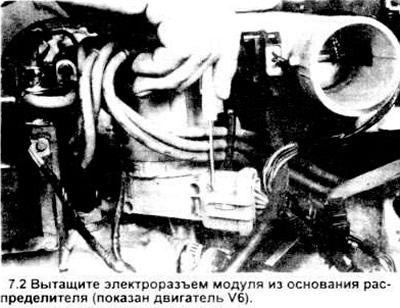
2. Disconnect the module electrical connector (see figure).
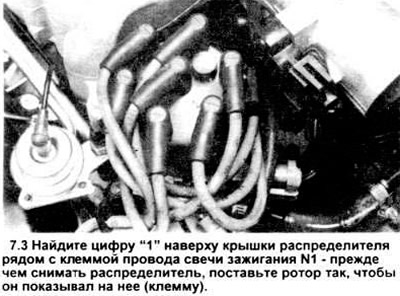
3. Find the number "1" on the distributor cap (see figure), which marks the terminal of the spark plug wire of cylinder No.1.
4. Remove the distributor cap (see chapter 1).
5. If you have a remote starter:
a) remove the spark plug from cylinder #1 (see chapter 1).
b) connect the remote starter to the starter relay and the positive battery terminal according to the manufacturer's instructions.
v) carefully crank the engine by turning the ignition key back and forth or by quickly pressing and releasing the remote control starter switch until the rotor is positioned opposite the #1 cylinder terminal.
g) disconnect the wire from the negative battery terminal.
d) go to paragraph 7.
6. If you do not have a remote starter.
a) disconnect the negative wire from the battery.
b) screw a large bolt into the crankshaft. Attach a ratchet and socket to the bolt.
v) turn the crankshaft until the runner points to the contact of the spark plug wire No.1.
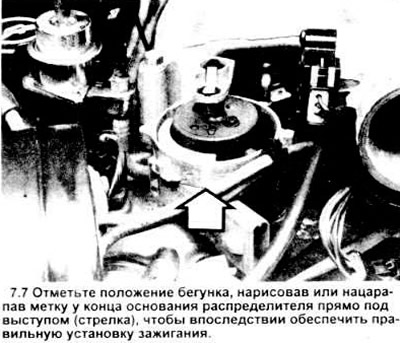
7. Make a mark on the edge of the distributor base under the runner protrusion and coaxially with it (if there are many protrusions, use the central one for certainty) (see figure). Also mark the distributor base and the engine block to ensure that the distributor is installed correctly.
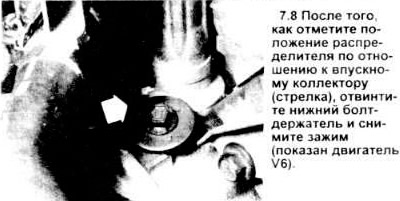
8. Remove the lower distributor retaining bolt, remove the clamp (see picture), then pull the distributor straight up to remove it. Be careful not to scratch the center drive shaft.
Caution: Do not turn the crankshaft after removing the distributor, otherwise the marks made will be useless.
Installation
9. Insert the distributor into the engine block in exactly the same position as you removed it.
10. You may have to rotate the rotor slightly to engage the screw drives on the camshaft and distributor. If the distributor does not fully engage, the hex keyway in the bottom of the distributor shaft does not align with the oil pump shaft. Recheck the marks from the base of the distributor to the block to make sure the distributor is in the same position it was before disassembly. Check that the mark on the rotor aligns with the mark at the edge of the base of the distributor. Then, using a socket and ratchet, rotate the crankshaft in the direction of its normal rotation (clockwise when viewed from the front). Since the mechanism on the distributor shaft is connected to the camshaft mechanism, their relative positions will change until the distributor is removed from the engine. This means that the rotor will rotate, but the oil pump shaft will not, because the two shafts are not yet connected. At the moment when this hexagonal groove on the end of the distributor shaft aligns with the oil pump shaft, the distributor will cover the pump shaft from above and its body will take a unique position relative to the block.
Note: If the crankshaft was moved with the distributor removed, determine TDC for piston #1 by removing the spark plug from cylinder #1 and using a remote starter (or a ratchet socket on the crankshaft pulley), turn the crankshaft so that the TDC mark on its pulley (see chapter 2) coincides with the stationary pointer on the camshaft drive chain cover. Make sure that piston #1 is exactly at TDC of the compression stroke (and not at the beginning of the suction stroke).
11. Once the distributor base is positioned relative to the block, rotate the distributor to align the marks on its base and on the block.
12. After aligning the marks, the runner will point to the mark made on the distributor body.
13. Replace the clamp and tighten the bolt.
14. Replace the distributor cap and tighten the cap screws securely.
15. Connect the ignition unit electrical connector.
16. Reconnect the wires to the spark plugs.
17. Connect the wire to the negative terminal of the battery.
18. Check the ignition timing (see section 8) and tighten the lower distributor retaining bolt securely.
[The text of the article was copied from the website: FordBook.ru]