Contents: Removal ↳ Installation ↳
Removal
1. After blocking the front wheels, loosen their wheel nuts, then jack up the front of the car and place it on supports.
2. Remove the corresponding front wheel.
3. Mark the relative positions of the tie rod and the ball joint, then back off the lock nut a quarter turn or loosen the clamp bolt nut, depending on the type of steering gear (see Figure 26.3).
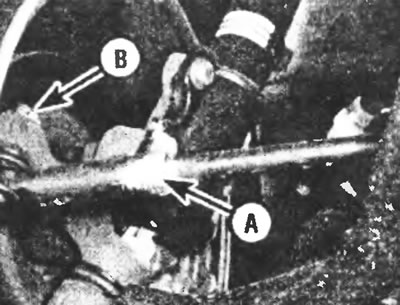
Figure 26.3. Tie rod lock nut (A) and ball joint to steering arm nut on models with rack and pinion steering gear.
4. Remove the cotter pin and unscrew the nut securing the steering arm to the ball joint.
5. Using a ball joint puller, release the end from the tie rod (see figure 26.5, a, b).
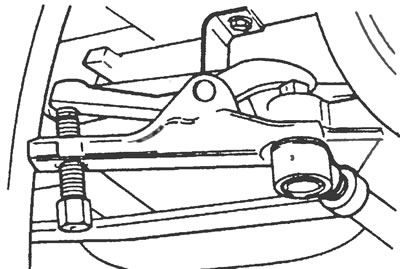
Figure 26.5,a. Ball joint puller for disconnecting the tie rod end from the steering arm.
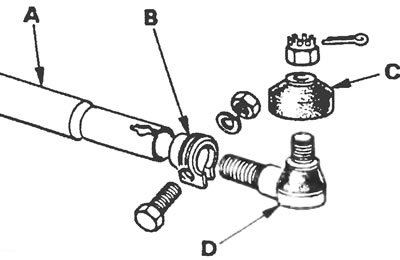
Figure 26.5,b. Details of the end of the transverse steering rod of the "screw-nut" type steering mechanism: A - Tie rod, B - Protective cap, C - Clamp, D - Tie rod end
6. Unscrew the tie rod end from the tie rod, noting the number of turns required to remove it. Please note that on models with dependent front suspension, the tie rod joints have left-hand threads on the left side and are unscrewed clockwise.
Installation
7. Screw the new end onto the tie rod with the same number of turns as noted during removal.
8. Insert the ball joint pin of the tip into the pivot arm and screw on the locking nut. Tighten the nut to the specified torque and secure with a new cotter pin. If necessary, tighten the nut a little more to align the cotter pin holes.
9. Tighten the tie rod joint lock nut or clamp bolt nut according to the steering gear type.
10. Install the wheel and lower the car to the ground.
11. Tighten the wheel nuts to the specified torque.
12. Check and, if necessary, adjust the front wheel alignment as described in Section 36.
This article was borrowed from the website (FordBook)