Withdrawal
1. Disconnect the wire from the negative battery terminal.
2. Place a drain pan under the radiator.
3. Remove the radiator cap, put a piece of rubber hose on the drain tube, open the drain. Drain the fluid from the radiator until until the liquid level drops below the level in the water outlet housing. Close the drain.
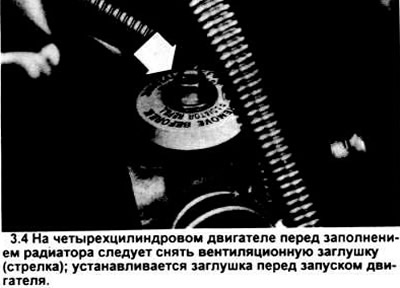
4. On a four-cylinder engine, unscrew the vent plug from the water outlet housing.
5. Loosen the hose clamp and disconnect the upper radiator hose from the water outlet assembly
6. Unscrew the fixing bolts (see pictures) and disconnect the water outlet housing.
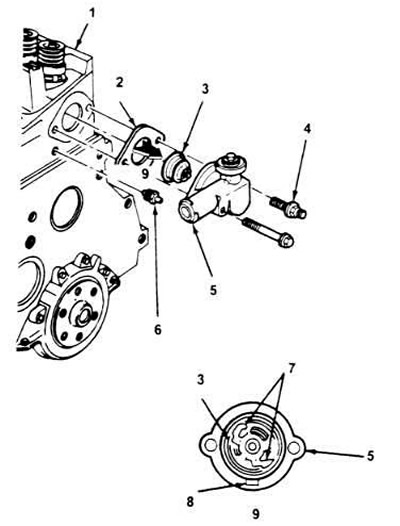
3.6, a. 3D view of a water outlet kit in a four-cylinder engine.
1. Cylinder head assembly.
2. Gasket.
3. Thermostat assembly.
4. Stud and washer.
5. Water release unit.
6. Water temperature indication sensor.
7. Align the thermostat tab with the notch in the water outlet housing, and push it into place through the gasket.
8. Tongue.
9. View A.
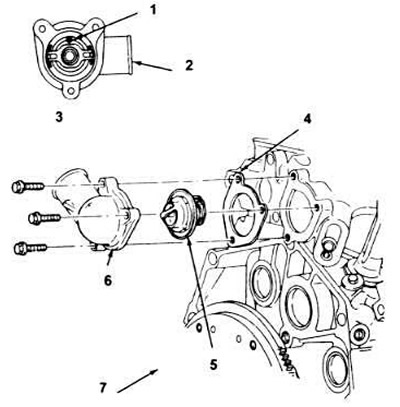
3.6b. 3D view of the water outlet kit on 3.0LV6 engines.
1. To connect the thermostat to the water outlet assembly, screw it clockwise into the assembly.
2. Water outlet kit.
3. The view shows a thermostat assembled with a water outlet assembly.
4. Water outlet gasket.
5. Thermostat.
6. Water release kit.
7. Front of the engine.
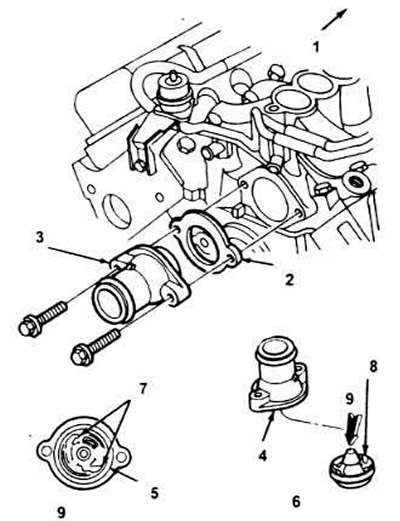
3.6, c. 3D view of the water outlet kit on 3.8LV6 engines.
1. Front of the engine.
2. Gasket.
3. Water release.
4. Water release.
5. Thermostat.
6. Sub-assembly (smaller).
7. Screw the thermostat clockwise into the connection, making sure the thermostat tab and the notch in the water outlet assembly line up.
8. Thermostat.
9. View A.
Note: If it is difficult to remove the case, gently tap it with a soft-faced hammer or piece of wood. Do not attempt to lift the housing with a lever, as this may damage the gasket surface and cause leaks.
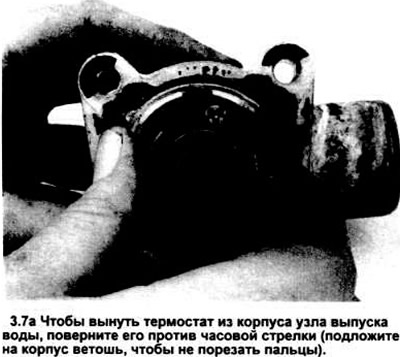
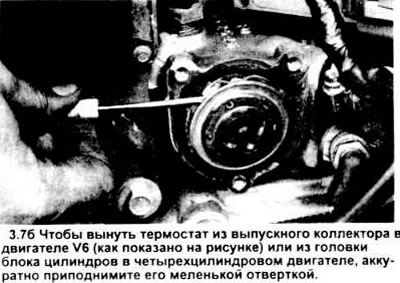
7. On V6 engines, to remove the thermostat from the water outlet assembly, you can turn it counterclockwise (see drawing). If he "stuck" to exhaust manifold (V6 engine) or cylinder head (in a four-cylinder engine), carefully pry it up with a small screwdriver (see picture).
Installation
8. Clean off the remnants of the old gasket and seal from the mating surfaces of the housing and cylinder head, then clean them with a cloth soaked in acetone or solvent.
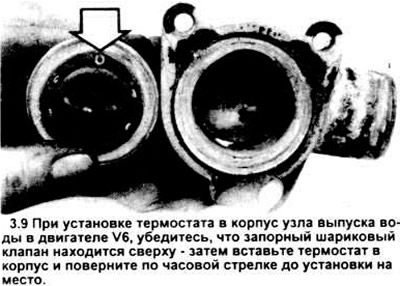
9. Installing the thermostat in a four-cylinder engine, start by aligning the thermostat tongue with the notch in the water outlet housing; then, pressing down, install the thermostat in place, compressing the gasket. When installing the thermostat on V6 engines, first make sure the shut-off ball valve is on top, then insert the thermostat into the water outlet housing and rotate clockwise to reinstall (see picture).
10. Apply a light coat of RTV Sealant to both sides of the new gasket, then place it on the body and bolt it on.
11. Place the water outlet kit and gasket in place on the cylinder head or manifold, screw in the bolts. Tighten bolts to specification torques.
12. Further installation is carried out in the reverse order of disassembly. Carefully check for possible leaks when the engine warms up to normal operating temperature.
Visitor comments