

SEQUENCE OF WORKS
1. Disconnect the cable from the negative terminal of the battery.
2. Remove the trunk trim together with the rubber seal.
3. Disconnect the connector from the rear window heater and wiper. Disconnect the hose from the rear window washer nozzle.
4. Support the trunk lid.
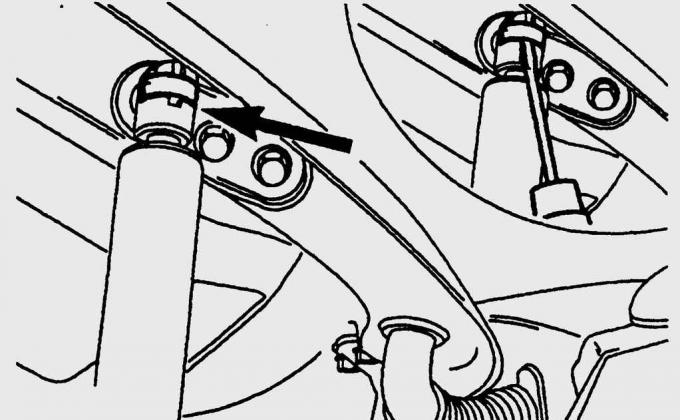
Fig. 17.13. Removing the gas-filled strut from the ball joint
5. Remove the gas-filled struts from the ball joints by slightly lifting the mounting brackets with a screwdriver blade (Fig. 17.13).
6. Mark the position of the trunk lid hinges.
7. Unscrew the four bolts and, with the help of an assistant, remove the trunk lid.
8. Install the trunk lid, tighten the hinges with bolts by hand and align the lid with the mating surfaces.
9. Tighten the trunk lid hinge mounting bolts to 10 N·m.
10. Further installation of the wing is carried out in the reverse order of removal.

PRACTICAL TIPS
Removing the trunk lid
To make it easier to pull the wires and hoses into the trunk lid after installation, tie thin strings to them before removing them. After pulling the wires and hoses out, untie the strings and leave them in the trunk lid. Then you can easily pull the wires and hoses into the trunk lid using these strings.
Replacing the rubber seal
1. Check the condition of the rubber seal of the trunk lid. Loose spots indicate traces of dust and moisture on both sides of the sealing surface. If the seal is porous or cracked, replace it. To do this, completely remove the seal and clean the edge from old sealing compound and dirt.
2. Apply fresh silicone putty sparingly into the grooves. Insert the rubber seal in the area of the lock and press it along the perimeter of the trunk lid. Trim the protruding ends of the rubber seal with side cutters. The trunk lid must be finally closed at a certain preliminary tension. Carefully tap the installed rubber seal with a rubber hammer.