Contents: Removal ↳ Installation ↳
Removal
1. Loosen the retaining screws and remove the front pillar panels.
2. Disconnect and remove the sun visors. Also remove the interior lighting assembly (Chapter 12).
3. With an assistant supporting the ceiling, unscrew the fasteners and remove the front ceiling panel (see Figure 31.3). On later models, the entire headliner is mounted on plastic clips that require a fork-tipped tool to remove (see Figure 9.11). These clips break easily, so be extra careful when removing them.
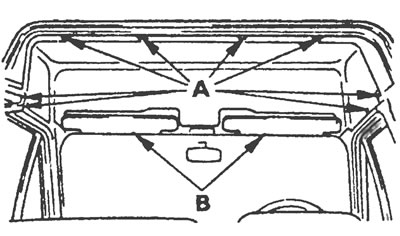
Figure 31.3. Plastic headlining clips (A) and sun visors (B).
4. If required, the central and rear ceiling panels can be removed in the same manner (if they exist).
Installation
5. To install the ceiling panel, position it correctly and secure it at the back with screw fasteners (press to secure), then route the interior light wiring along the front edge of the trim and secure it in place with the trim.
6. Once completed, reinstall the interior light and A-pillar trim.
[The original can be found on the specified resource: www.FordBook.ru]