

SEQUENCE OF WORKS
1. Turn off the light.
2. Open the hood.
3. Lift the radiator grille up and remove it.
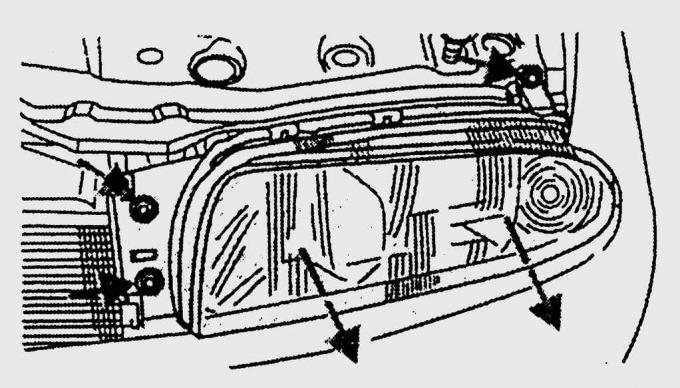
Fig. 15.15. Location of mounting screws and direction of headlight removal
4. Unscrew the three bolts and remove the headlight from the front panel (Fig. 15.15).
5. Press the latches and disconnect the contact connector.
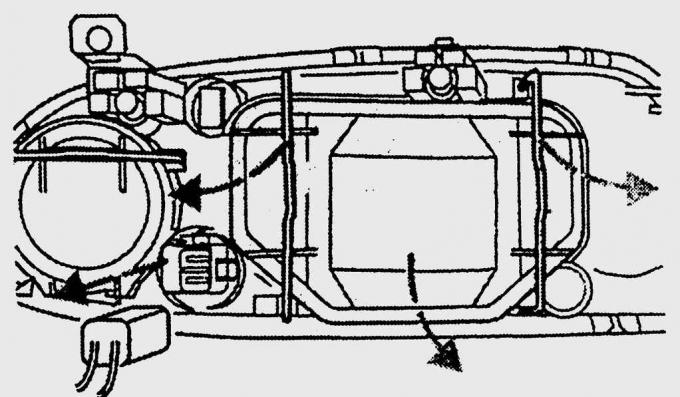
Fig. 15.16. Directions for pressing the wire clips and removing the cover from the rear of the headlight
6. Push the two wire clips to the sides and remove the cover from the rear of the headlight (Fig. 15.16).
After replacing the lamp, the headlight is installed in the reverse order of removal.
Replacing the low beam headlight bulb
1. Disconnect the contact connector from the lamp.
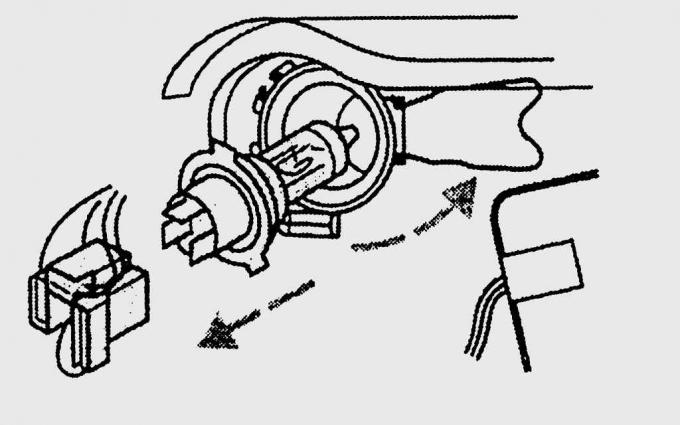
Fig. 15.17. Replacing the low beam headlight bulb
2. Compress the spring clamps of the lamp mount and fold them to the side (Fig. 15.17).
3. Remove the bulb from the headlight reflector.
4. Holding the new lamp by the base, install it so that the base fits exactly into the grooves of the reflector.
Replacing the high beam headlight bulb
1. Disconnect the contact connector from the lamp.
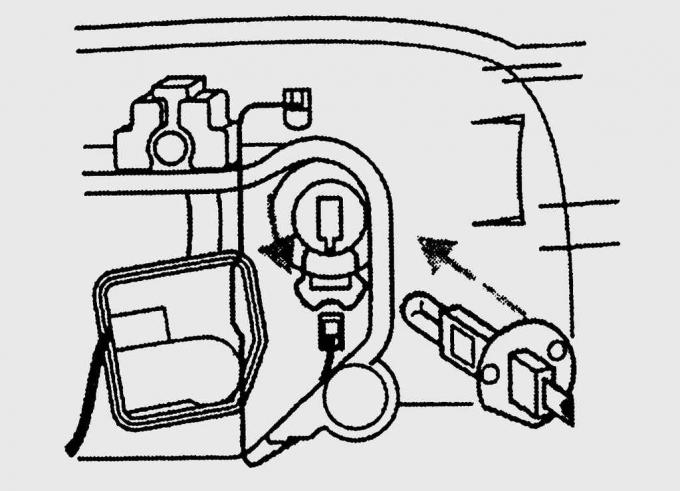
Fig. 15.18. Replacing the high beam headlight bulb
2. Compress the spring clamps of the lamp mount and fold them down (Fig. 15.18).
3. Remove the bulb from the headlight reflector.
4. Holding the new lamp by the base, install it so that the base fits exactly into the grooves of the reflector.

PRACTICAL TIPS
Adjusting headlights after each lamp replacement
Since the reflector position may be disturbed when replacing the headlight bulb, place the car in front of a dark wall and trace the light beam with chalk before replacing the bulbs. After replacing the bulb, compare the new light beam with the one previously marked on the wall. If the headlight beam adjustment is disturbed, have it adjusted at a car repair shop.