Contents: Removal ↳ Installation ↳
Removal
1. Remove the lower left part of the instrument panel.
2. Disconnect the interior switch electrical connector.
3. Remove the clamp from the switch rod (see figure).
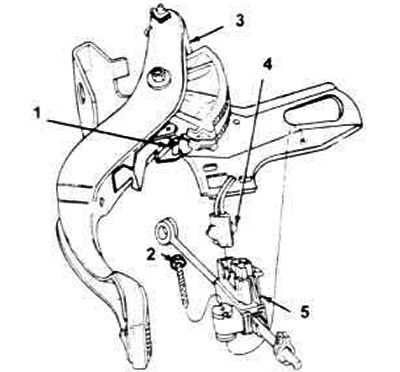
6.3. Internal starter/clutch switch mounting details.
1. Clamp.
2. Screw.
3. Clutch pedal and bracket assembly.
4. Wiring connector.
5. Internal starter/clutch switch assembly.
4. Loosen the screw that secures the inner switch to the bracket and remove the switch.
Installation
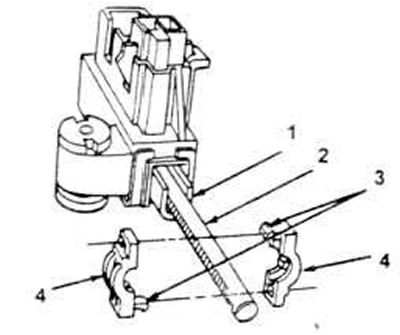
5. Position the adjusting clamp approximately 25mm (1 inch) from the end of the rod (see illustration).
6.5 If the engine does not turn over when the ignition key is turned and the clutch pedal is fully depressed, separate the adjusting clamp and move it closer to the switch.
Note 1: To remove, press both teeth of the lock and pull it out to the side.
Note 2: When installing, place both halves of the clamp on the rod approximately 25.4 mm (1 inch) from the end of the rod; press the halves together to close the lock teeth.
1. Plunger.
2. Barbell.
3. Lock tooth.
4. Half clamp.
6. Attach the end of the rod with the eye to the pedal pin.
7. Keeping the clutch pedal in the up position at all times, rotate the switch up into place. Screw in and tighten the mounting screw securely.
8. Press the pedal to the floor to adjust the switch.
9. Replace the lower part of the instrument panel.